 Calibration CurvesCalibration Curves
In the Imaging Configurations screen, select the Properties for the printer to be calibrated.
NOTE: All printer settings, inkset, media type, print modes, etc. must be selected before proceeding with the Calibration Process!
Click the Clear button on the Color Transforms screen (Illustration 1).
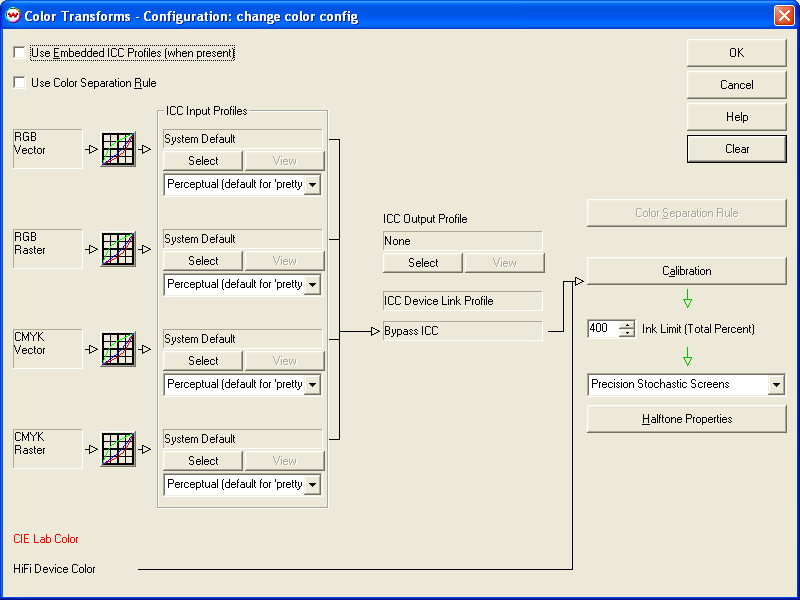
Illustration 1: Clearing the Color Transforms menu
Begin by printing the appropriate test pattern for your densitometer (Illustration 2). These test patterns are located in the "psfiles" folder on the same hard drive that Wasatch SoftRIP is installed on.
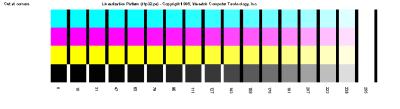
Illustration 2: Example linearization pattern
Like nearly all linearization patterns distributed with Wasatch SoftRIP this pattern can be used for color, or for linearizing films, in which you would only scan the "black" row of patches.
NOTE: For the production of separated films, normally you will want to linearize "Dot area" rather than density. If you are using hand entry for your densitometry, simply enter the appropriate numbers. And if you are using a densitometer, directly connected to SoftRIP, and it does not measure dot percent, see the "Densitometry" section of online help. Read the section on "Density vs. Dot Area" for a discussion of SoftRIP tools for performing the "Yule-Nielsen" calculation.
Click the Calibration button on the Color Transforms window (Illustration 1) to launch the Calibration window (Illustration 3).
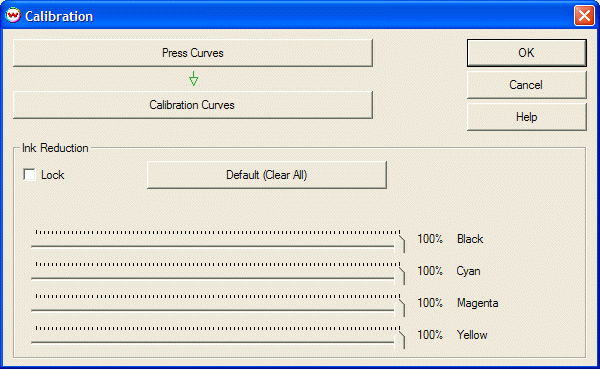
Illustration 3: Calibration window
NOTE: When producing separated films, Do Not change the Ink Reduction sliders from their 100% defaults. These controls are intended strictly for color printing with FM screens. Any change from 100% will cause problems, such as 'pinholes', in the films.
Click the Calibration Curves button and use the Densitometers menu to select your measurement device, or Hand Entry to enter values manually. Most supported densitometers provide a Wizard to input data from your test pattern and guide you through Calibration. More information on specific densitometer brands can be found in the Densitometers area of online help.
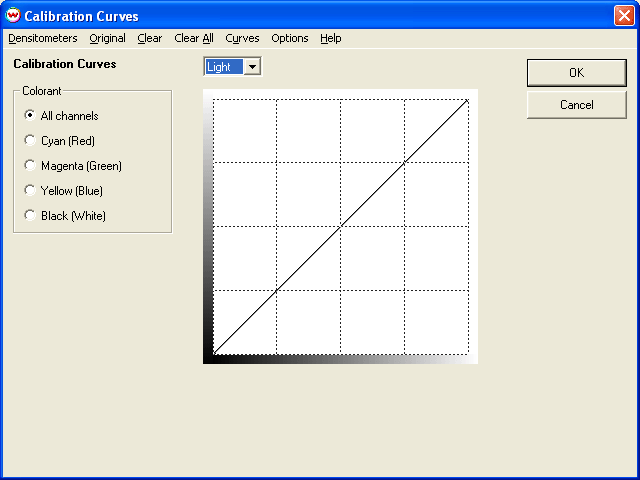
Illustration 4: Calibration Curves window
Once densitometric data has been entered, Calibration Curves will be displayed on the main window of the Calibration screen. If your films are already nearly "linear", the curves will be fairly close to the diagonal line. This is fairly common at very low lpi, but more often you will see some substantial curvature (Illustration 5). NOTE: These curves are not the data you measured, but the curves computed by Wasatch SoftRIP to cause the printer to print linearly.
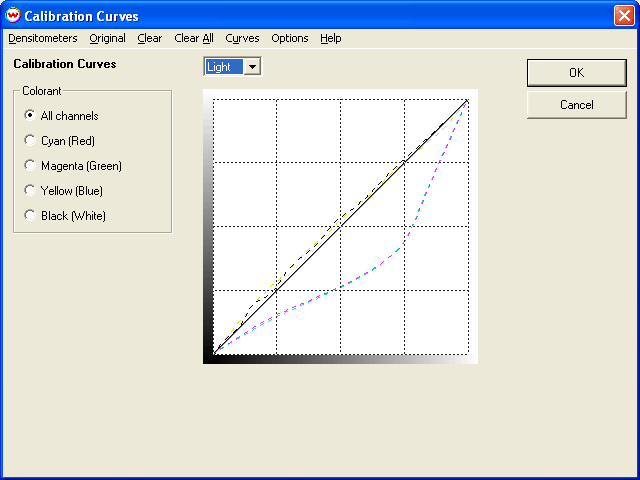
Illustration 5: Example of Calibration Curves
Save your imaging configuration with an appropriate name such as "linearFilmA".
Films produced with this imaging configuration will be linear.
Using an imaging configuration that produces linear films as a starting point, it is possible to derive additional imaging configurations that will linearize, or create other behavior on the press.
This is done simply by selecting "Press Curves" from the Illustration 3 above. All the same tools that are available for Calibration Curves are also available here. One possible use is to linearize the press based on measurements of final prints. Another use is to define "Desired Curves" using the various tools on the "Curves" menu of the "Press Curves" window. Various pre-defined curves are available there, and for "custom" tailoring of the press curve, select "Enter Curve" (Illustration 6).
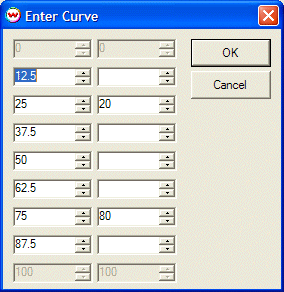
Illustration 6: Calibration window