 Workflow Workflow
Wasatch SoftRIP supports several alternatives for creating color separations within a production workflow.
This workflow uses a composite color image in Wasatch SoftRIP, and configures the RIP to produce four-color separations. This mode of operation is normally selected from the Properties window for the specific printer being used. Four monochrome prints are produced; one for the Cyan, Magenta, Yellow, and Black separations.
To use this workflow, select a printer in monochrome mode from the Printer Model drop-down menu in the Setup window. Click the Edit button to launch the Imaging Configurations screen, shown in Illustration 1.
Illustration 1: Selecting the Properties button on the Imaging Configurations screen
Click on the Properties button next to the Printer Model window. A printer-specific menu similar to that shown in Illustration 2 will launch. Check Make Separations on RIP as shown in Illustration 2.
Illustration 2: Check Make Separations on RIP
The biggest advantage of this workflow is the ability to apply an ICC color profile to your composite color image before it is separated. This creates some powerful possibilities for managing color in your printing process. The disadvantage is that you are confined to CMYK separation only. This may be particularly limiting in screen printing applications where the use of numerous spot color plates is common.
Making separations on the RIP from composite color files often requires support for PostScript 'Overprint'. Although Adobe documentation recommends very restricted use of this PostScript feature (Adobe Tech Note 5145), applications such as Adobe® Illustrator®, CorelDRAW®, and QuarkXPress® use this to specify trapping in composite color files. Please note that this PostScript feature is confined to CMYK color only.
In Wasatch SoftRIP SP, Support Postscript Overprint can be specified as part of an Imaging Configuration, as shown in Illustration 3.
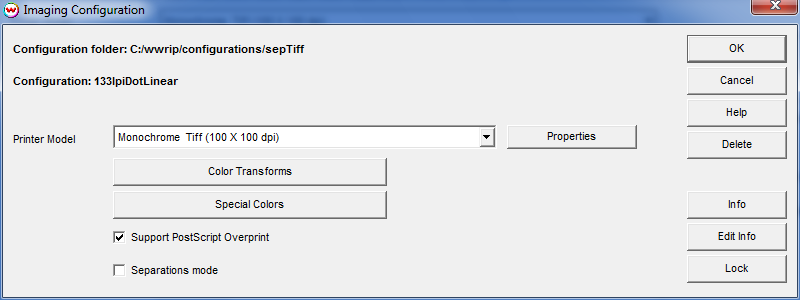
Illustration 3: Support PostScript Overprint specification
This setting is intended only for making separations from composite color files. Normally it should only be checked for configurations using the Make Separations on RIP workflow with monochrome output devices. It is not intended for color printing, and overprinted regions generated by this operation will not be properly color managed.
The Separations mode selection allows for the choice of two different types of separation, either a full separation, or a process color equivalent.
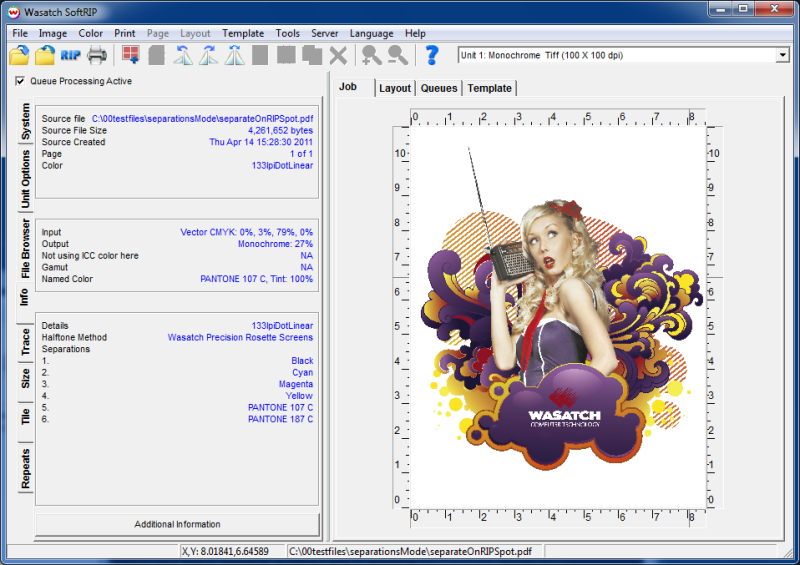
Illustration 4: A file with both process and spot colors
Note that six different colors are listed in the lower left corner of Illustration 4. When Separations Mode is not selected, an equivalent rendering in four-channel process color is produced. See Illustration 5.
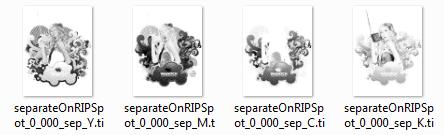
Illustration 5: Process color equivalent separation
This can have some advantages, by allowing ICC color management to be part of the separation process.
It is, however, more common to want all colors separated. When Separations Mode is selected, all the colors are rendered directly as a six color separation.

Illustration 6: Automatic separation of six channels
When operating in Separations Mode, SoftRIP will automatically discover the correct separation colors from the incoming jobs, whether they are opened by a user or submitted by Wasatch ImageNET, through a hot folder, with no user interaction. If only two or three spot colors are present, only two or three separations will be produced. If there is a combination of process and spot colors, as in this example, an appropriate number of correct separations will be produced automatically.
When SoftRIP is operating in Separations Mode, clicking on the Color Transforms button produces a simplified set of controls, suitable for this workflow, as shown below:
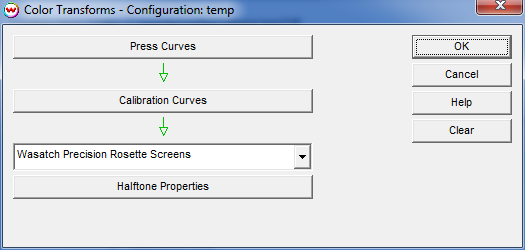
Illustration 7: Transforms available in Separations mode
Two halftoning options are available when using Separations Mode; Wasatch Precision Stochastic Screens and Wasatch Precision Rosette Screens.
An alternative workflow is to perform color separations prior to sending jobs to the RIP, handling all issues involving separation, color management, and trapping prior to sending monochrome "plates" to Wasatch SoftRIP. To use this workflow, remove the check mark from Make Separations on RIP as discussed above.
This workflow is more flexible, but presents its own special issues. The biggest challenge is the reliability of automatic plate identification (the automatic distinction between Cyan, Magenta, and so forth). Plate identification standards have not been consistently implemented amongst graphics software companies.
Wasatch SoftRIP can generally make accurate plate identifications from CorelDRAW®, Illustrator®, FreeHand®, QuarkXPress®, and other applications that are consistent in their use of standard PlateColor comments.
When plates are accurately identified, the screen specifications you have made for Cyan, Magenta, Yellow, and Black plates are applied properly in your pre-separated jobs. Spot color plates use the settings you've specified for "Default" or whatever has been specified in the PlateColor Table Editor (discussed below). When the identification fails, the most common effect is for all plates, not just spot plates, to be screened with the settings for "Default".
In Wasatch SoftRIP SP, the Print Queue includes a fourth column of information called "Separation". This column helps to identify the plate and the halftoning choices that SoftRIP has made for the rendering of that plate.
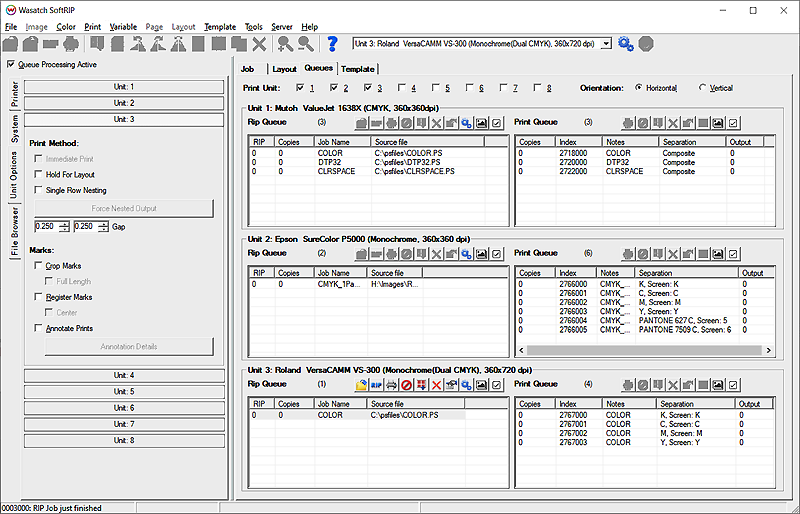
Illustration 8: Print Queue Separation column included in SoftRIP SP
Unit 1 in Illustration 8, above, is a composite color device. The Print Queue entries have not been separated, as indicated by "Composite".
Unit 2 shows a job that was separated into six plates. In the Separation column, the PlateColor from the PostScript file is shown followed by "Screen:" and a letter showing which halftone screen will be applied. In this example, the unrecognized PlateColor values of the two PANTONE colors have been set to use "Screen 5" and "Screen 6", instead of K, C, M, or Y.
Unit 3 has been configured for "Make Separations On RIP". The Print Queue shows the job was processed into four plates: K, C, M, and Y.
In Wasatch SoftRIP SP, you can reassign the mapping of PlateColor. When making separations in application software, the identity of the plates that are sent to Wasatch SoftRIP is often provided by the PostScript PlateColor comment. Some application software (notably QuarkXPress®) is very flexible in the way that it uses this comment. This can interfere with the desired screening, and for this reason a user-editable table of mappings is provided.
Edit this table in Wasatch SoftRIP SP by selecting the Edit PlateColor Table tab on the Preferences window. You can add entries using the Add button. You can edit or delete a line by double-clicking it.
Illustration 9: Edit PlateColor Table included in SoftRIP SP
One of the main advantages of Wasatch SoftRIP is that you can intervene in jobs before sending them on for output. Do this by unchecking the Active option in the Hot Folder settings, in the Server menu. Now you can proceed with the operation of opening your PostScript jobs, from the hot folder, using SoftRIP's File menu.
Separate the job within your application software and print the separations to a folder where Wasatch SoftRIP can access them. Some applications will produce multiple files for the various plates and others will produce a single PostScript file with multiple pages. Both are handled in much the same way due to Wasatch SoftRIP's flexible handling of multi-page files.
After you have set up all your plates with hand-assigned screen angles in the RIP Queue, Wasatch SoftRIP's normal queue capabilities will process the specified output.
NOTE: When a page is added to the RIP Queue, the Imaging Configuration that is currently selected will be used when the job is processed. You can set up a number of configurations with different screen angles, and assign them by hand to the appropriate pages or plates.
With Hot Folders, you can configure Wasatch SoftRIP as a pass-through RIP that will automatically process files arriving through the folder. From the Server menu, Hot Folders can be independently activated for one or more of the print units. By maintaining separate "hot folders" for each printer, SoftRIP acts as multiple "virtual RIPs" on your network.
SoftRIP's server logic operates by watching a Hot Folder along with all its subfolders. Files to be printed may arrive in that folder (or one of its subfolders) by a variety of methods, such as a network transfer, the Wasatch Port Redirector, or directly saving out of a graphic application. To send files from a Macintosh or UNIX platform workstation, you can use the Wasatch ImageNET™ service, or a third-party network solution (read more in the ImageNET™ Network Services section of online help).
Illustration 10: Hot Folder controls
To activate a hot folder for the current printing unit, launch the Hot Folder screen from the Server menu. Check the box next to Active to activate the controls (Illustration 10).
Checking Create Preview Images produces preview thumbnails for entries in the RIP and Print Queues.
NOTE: To use the Rotate, Mirror, and Scale features, YOU MUST CHECK THIS BOX.
The following three options are available for Action to take with arriving files:
Two delete options exist for keeping Hot Folders and queues clean. By checking Delete PostScript after RIP, both the files in the folder and the associated RIP queue entries will be removed after the RIP process. Checking the Delete Print after Output option will remove all print queue entries that were generated once they've been printed. These features are essential if you are operating with limited disk space.
If the Multi Process Large Page Count option is enabled, along with using multi-page PDF files, then the files are automatically split up for parallel processing.
Pressing "Setup" will launch this window:
Illustration 11: Large Page Count controls
This window is used to configure automated handling of multi-page PDF Files that arrive in hot folders. It allows for advance setup of rows and columns, and enables parallel processing for high speed. This window can also be lauched for subfolders, under the "Configuration" button, to allow different settings to be established in hot subfolders.
With SoftRIP, you can associate different imaging configurations with hot folders or with any of the nearly unlimited number of subfolders. These imaging configurations can contain specific settings for halftone frequencies and angles.
The window shown in Illustration 12 was launched by clicking the Configuration button where the hot folder is "c:/incoming.1", and where that folder contains four subfolders with names that reflect the screen settings of their associated imaging configurations.
Illustration 12: Assigning Imaging Configurations to specific workflows
In Illustration 12, the "root" hot folder, named "c:\incoming.1", has been configured to use the imaging configuration set for the current unit (Unit 1 in example).
The subfolder named "lpi65angle22.5" has been set to use an imaging configuration named "65lpi_22_5degrees". Any files that land in that folder will use that imaging configuration.
Files that land in "c:\incoming\lpi65angle7.5" will use the imaging configuration named "65lpi_7_5degrees".
The rest of the folders have their own special imaging configurations. All these imaging configurations have been set up to specify halftone angles and frequencies as indicated by their names.
You can change the settings for any of the folders by clicking on the specific line, as shown in Illustration 12. This will open a window similar to Illustration 13, below:
Illustration 13: Changing the Imaging Configuration for a hot folder
In this window, you can choose to use the default imaging configuration or any imaging configuration currently installed on your system. The number of subfolders allowed is essentially unlimited, as is the number of possible imaging configurations. This allows a nearly unlimited number of halftone settings and other color related options to be controlled simply by your choice of hot folder.