Automated Cutting with Barcodes
Barcode Workflow Overview:
Barcode integration transforms manual labor into a fully hands-off operation by streamlining the entire finishing process.
Benefits of a Barcode Workflow
- Eliminates the risk of using the wrong cut file for your print.
- Process diverse cuts on printed roll seamlessly.
- Reduces downtime between jobs to nearly zero.
- Frees up operators to focus on other tasks while the machine works.
Barcode Workflow Process
It begins when every print job is generated with a unique barcode along with the registration marks, effectively encoding the cut data directly onto the media. Once the material is loaded, the cutter’s optical sensor reads the barcode and instantly communicates with Wasatch SoftRIP to acquire the associated cut data without any manual file searching.
The cutter then scans the registration marks to adjust for any print skewing before proceeding to cut. This allows for continuous production where you can move from Job A to Job B without ever touching the computer, as the machine recognizes each change and adapts automatically to the next task.
Breakdown of Steps
-
1. Cutter Setup: Initial settings should be set on the cut device prior to work beginning, to ensure the cutter is prepared for the intended jobs.
2. Print & Encode: When the artwork is sent to the printer, Wasatch SoftRIP automatically generates a unique barcode and registration marks on the media.
3. Database Linking: Simultaneously, Wasatch SoftRIP saves the corresponding cut paths, indexed to that specific barcode ID.
4. Load & Scan: The operator loads the printed media into the cutter and instead of the operator searching through computer folders for the cut file, the cutter's optical sensor simply scans the barcode printed next to the image.
5. Automatic Data Retrieval: The cutter queries Wasatch SoftRIP for the cut file that matches the barcode, then acquires the correct cut data.
6. Dynamic Adjustments: Before the blade touches the media, the cutter scans the physical registration marks. This allows the cutter to calculate if the print has stretched, shrunk, or been loaded at an angle. It adjusts the cut path accordingly then executes the cut with perfect alignment.
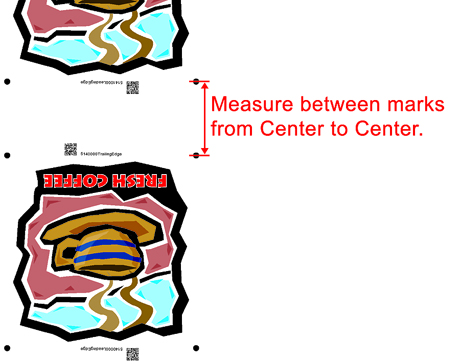
7. Continuous Cutting: If there is a different job printed immediately after the first one, the optical sensor detects the new barcode, acquires the associated cut data, and begins the next task without stopping. Certain cutters require the distance between jobs to be entered into the Properties window, within Wasatch SoftRIP. See examples below.
 |  |
Each Cutter is Unique
Wasatch SoftRIP supports barcode workflows on several different cutters. Each cut device has it's own unique settings such as barcode type, size and location of the barcode, and communication method. For information specific to your cutter, please refer to the Help file for that device. Different cutters may have different workflows and features.
Barcode Types
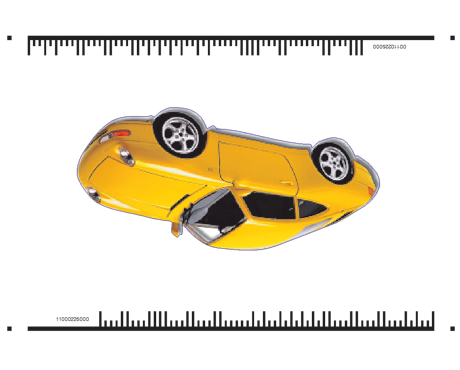 Summa Barcode Example |
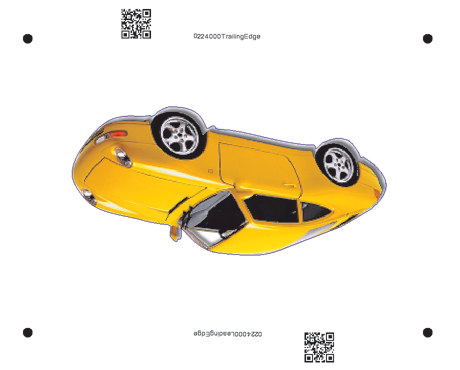 Flatbed QR code Example |
Communication Methods
- TCP/IP Cable Connection: Some cutters, such as Summa, can be connected using TCP/IP.
- USB Cable Connection: Certain flatbed cutters, and some Summa cutters, can connect using a USB cable.
- USB Thumbdrive: The Graphtec cutters supported in Wasatch SoftRIP require all files to be saved to a USB thumbdrive for the automated workflow.