 DGI Omega Series
 DGI Omega Series
The DGI Omega Series are cut only devices, and are only available if the special registration code, "CUTTING", is enabled.
The cutter's offset, force, and speed can be set on the front panel of the device. Consult the User's manual for more information.
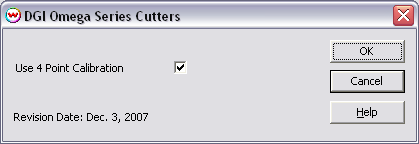
To use the 4 point advanced calibration make sure that the option is checked in the property window.

Device-Specific Instructions for Print now, Cut Later with advanced calibration.
Note: The print should have been printed with either the 1/4 Inch Register Marks or 1/2 Inch Register Marks. Select these marks from the "Cutting Mark" menu on the Print Setup screen.
Insert the media from the back with marks 1 and 2 on the leading edge, and lower the pinch rollers.
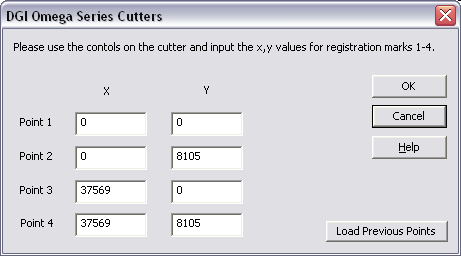
Use the arrow keys to move the cutting blade to mark 1. Press the origin button. Write down the X and Y values for this mark. Repeat for marks 2-4. Move cutter back to position 0,0. (leading edge of media and head to the far right) Press origin button. Cutter should now register that the X and Y value is 0,0.
The cutter is now ready for the cut path to be sent from the Cutting Queue. When prompted during cutting please enter the X and Y values for the 4 marks into the popup window.

Device-Specific Instructions for Print now, Cut Later without advanced calibration.
Note: The print should have been printed with either the 1/4 Inch Register Marks or 1/2 Inch Register Marks. Select these marks from the "Cutting Mark" menu on the Print Setup screen.
Insert the media from the back with marks 1 and 2 on the leading edge, and lower the pinch rollers.
Press the Down arrow key and while holding it down press the Enter key, which places the device in Alignment mode. Move the head by using the arrow keys on the front panel and position the blade over mark 1 on the print. Press Enter. Move the head the the mark labeled 3 (not 2!) and press Enter again.
The cutter is now ready for the cut path to be sent from the Cutting Queue.
To use the cutter through the USB interface you must do the following steps.
Plug in the printer and install the drivers as directed in the DGI Omega manual.
Press the Windows Start button, and then choose Settings and Printers. Then open the Add Printer icon. When you reach the window that displays a list of manufacturers, select Generic, and then select Text Only from the list of printers. When you reach the window that asks what port to select choose the DGIP port.
You can then select this driver for use by Wasatch SoftRIP in SoftRIP’s Setup window. (If you rename this driver, be sure to leave the first word Generic; otherwise the driver will not appear as an option in Wasatch SoftRIP’s Set Up screen.)