 Graphtec Silhouette Cameo Cutter
January 16, 2015
The Graphtec Silhouette Cameo is a cut only device and requires the CUTTING special registration code.
Note: The Graphtec Silhouette Cameo cutter will support a page size of 12" x 12" inches or smaller.
Physical Connection: Choose the physical connection from the 'Setup - Print Unit' window.
- USB: When you first connect the cutter into a USB port, you will be prompted for a USB driver. This driver is included on the CD provided by Graphtec. Please refer to the Graphtec documentation for assistance with installing the USB driver. Press the Setup button to the right of the physical connection dropdown, then Scan USB. If the device is connected properly, you will receive a message USB connection found, and will be listed in the Physical Connection dropdown.
Graphtec Silhouette Cameo Options
Pressing the Properties button next to the Printer Model window on the Imaging Configuration screen will launch a control panel for this cutting device.
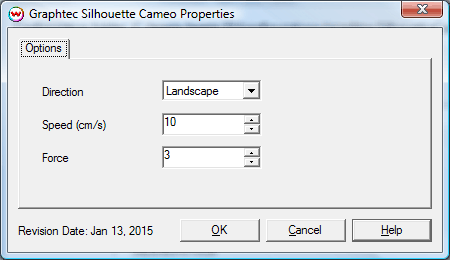
- Direction: This control specifies if cut jobs to be rotated landscape or portrait.
- Speed (cm/s): Controls how fast the head moves to complete the cut sequence(s).
- Force: This control tells the cutter how much force is to be applied to the blade when cutting the media.
Device-Specific Instructions for Print now, Cut Later
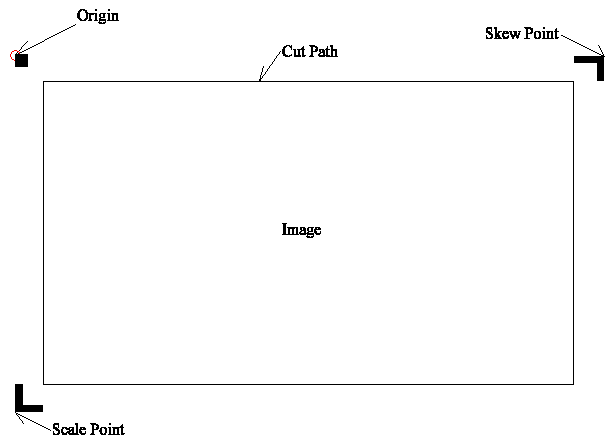
The prints should be printed with 'Graphtec Silhouette Cameo' Registration marks. These marks can be selected from the "Cutting Mark" menu on the Print/Setup screen prior to printing. A illustration of these marks are displayed below:
Loading the media:
- Place the printed job on the adhesive pad with the arrow pointing into the cutter, load the media on the cutter, press 'enter'.
- The cutter is now ready for the cut path to be sent from the print queue in SoftRIP.
- Once the cutting is complete, the cutter will rewind to the origin
- Press 'enter' to eject the pad from the cutter.
Device-Specific Instructions for Cut Only
Loading the media:
- Place media on the adhesive pad with the arrow pointing into the cutter, load the media on the cutter, press enter.
- In SoftRIP, select the unit setup for the cutter in the unit dropdown, press rip and Print while on the job or layout tab.
- Once the cutting is complete, the cutter will rewind the pad to the starting point.
- Press enter to eject the pad from the cutter.