CutPath with Adobe Illustrator CC
The following technical note will walk you through creating a cut path in Adobe Illustrator CC to use with Wasatch SoftRIP.
- Start by creating a new blank document.
- Click on Window and select Swatches if it does not have a check next to it.
- Click on Window again and select Stroke if it does not have a check next to it.
- To create a new Swatch, click the wing menu in the Swatches panel and select New Swatch.
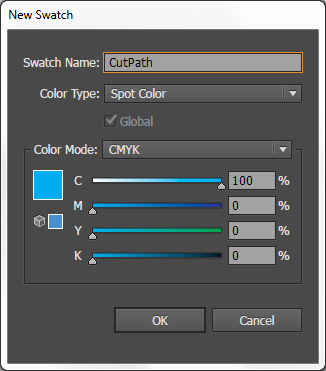
- The swatch name can be the default
cutpath or your own custom cut color name (e.g. mycut).
- Set the Color Type to Spot Color.
- Choose any color space you prefer. SoftRIP will replace the stroke with "marching ants" along the cut path.
- Click OK to save the swatch.
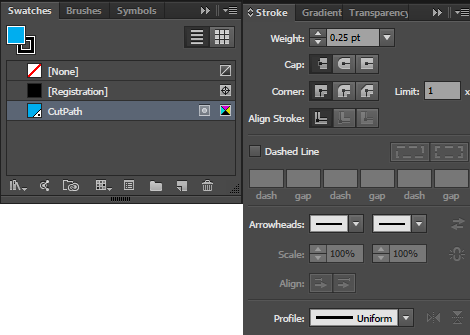
- In the Stroke panel wing menu, select Show Options and apply these settings:
| Weight | 0.25 pt |
| Miter Limit | 1 |
|
- Set Transparency to Normal at 100% Opacity.
- Select your artwork stroke and then choose your cut path color swatch (
cutpath or custom name).
- Create your artwork with this stroke around the shapes you want to cut.
- When finished, save or print to create a .ps, .eps, or .pdf file.
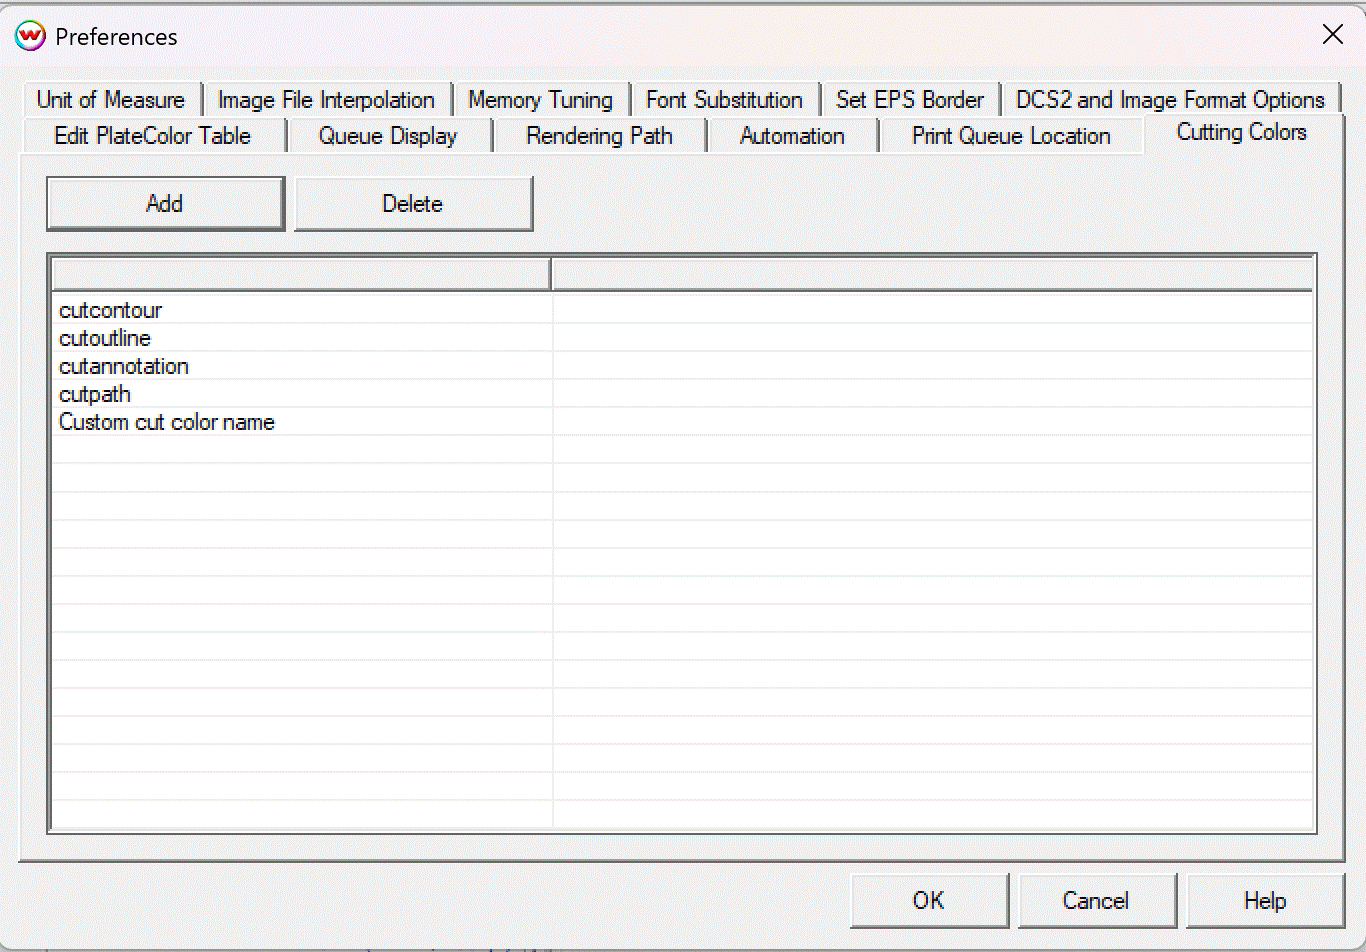
Setting up custom cut colors in SoftRIP
These settings let you manage multiple cut paths by color name. Each cut color you define will be processed separately, pausing between cuts for tool changes.
- Open SoftRIP and navigate to File > Preferences.
- Select the Cutting Colors tab to open the cut colors manager.
- Use the Add and Delete buttons to manage your cut color list. Names must match exactly what you set in Illustrator.
- Drag colors to reorder. SoftRIP will cut in the listed order, pausing between each color.