 Barbieri Spectro 50xy Barbieri Spectro 50xy
Prior to using the Barbieri Spectro 50xy interface, you must print out the barbierispectro50xy_4color.PS file, located in the "psfiles folder" at the root of the drive where Wasatch SoftRIP is installed.
Note: Use the barbierispectro50xy_5color.PS for a 5 color device and barbierispectro50xy_6color.PS for a 6 color devic. These are the only test patterns that will work with this device.
After you click on the Barbieri Spectro 50xy option from the Densitometers menu, the following window will be displayed:
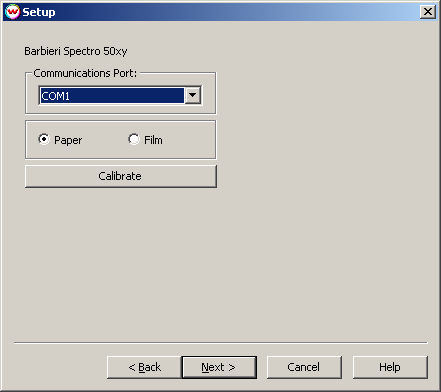
Click on Calibrate to initialize and calibrate the device. After the device has finished calibrating, you will see the message, Calibration Complete. Click on Next.
This Process Test Strips screen begins the strip reading process. Select the colors that you would like to linearize (if you uncheck a strip, the device still must read the entire target, but the data from that strip will be discarded). To begin reading the strips, click on the Read Strips button. The device will start the strip reading process.
After the densitometer has returned the strip values, you will see the message Complete. Click on the Finish button to generate the curves.