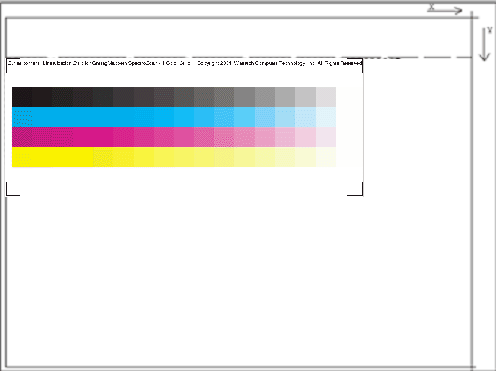
Prior to using the SpectroScan interface, you must print out the spectroscan_4color.PS, located in the psfiles folder at the root of the drive where Wasatch SoftRIP is installed. (Use spectroscan_5color.PS for a 5 color device, etc.) These are the only test patterns that will work with this interface. You must place this test pattern over the scanning surface as shown below:

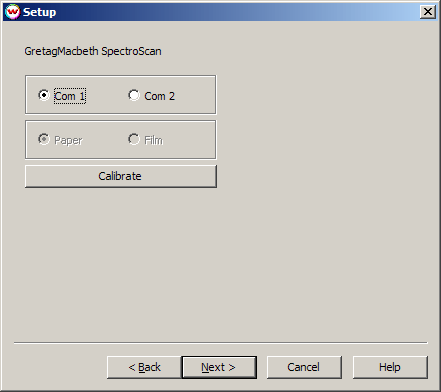
The Setup screen is used to select the port for your device and calibrate your device.

The Calibrate button will begin the calibration sequence for the SpectroScan. Calibration is not necessary to begin reading values; however, the accuracy of these measurements can be greatly affected by a miscalibrated device. When you click on Calibrate, the device will calibrate itself, and move the sight (crosshair) over the approximate location of the first patch. Calibration should only take a few seconds.
To proceed to the next step, click on the Next button, which will launch the following screen:

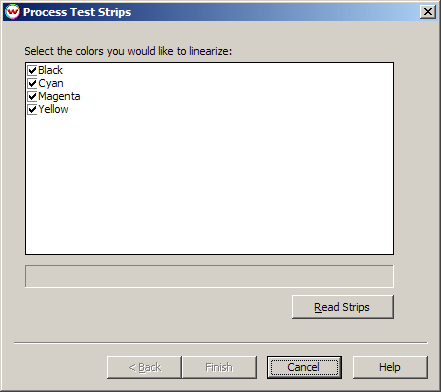
This Process Test Strips screen begins the strip reading process. Select the colors that you would like to linearize. To begin reading the strips, click on the Read Strips button. The following message will then be displayed:

Use the arrow buttons on the SpectroScan to position the crosshair over the left-most black patch on the target (regardless of whether you want to scan in the black strip), and press OK. The scanning process will then start.
After the densitometer has returned the strip values, click on the Finish button to generate the curves. Colors that you did not measure will not be overwritten should curves already exist.