Wasatch SoftRIP Installer Help
Welcome Page
The Welcome page appears differently depending on whether an existing SoftRIP installation is detected:
New Installation
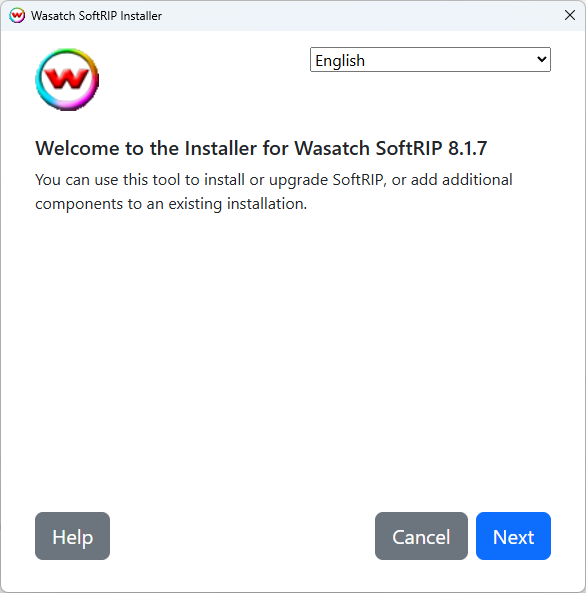
When no existing installation is found, the page shows only the welcome message and proceeds directly to a fresh installation.
NOTE: When performing a fresh installation using a USB dongle key, the Sentinel Protection Installer utility needs to be downloaded and installed.
Existing Installation Found
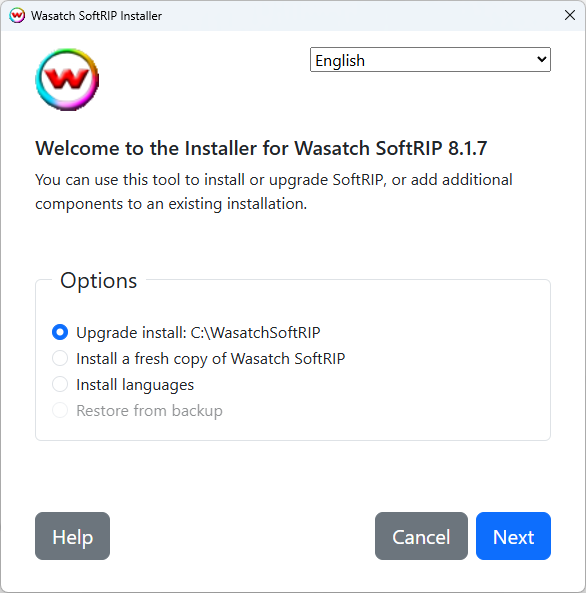
When an existing SoftRIP installation is detected, additional installation options become available:
Installation Options: Choose from the following:
- Upgrade Install: Updates an existing SoftRIP installation (shown with current install path)
- Install a Fresh Copy: Installs SoftRIP to a new location
- Install Languages: Adds language packs to an existing installation
- Restore from Backup: Restores a previous backup (only available if backups exist)
Language Dropdown: Select your preferred language for the installer interface.
Help Button: Opens this help documentation.
Cancel Button: Exits the installer.
Next Button: Proceeds with the selected installation option (or fresh install if no options are shown).
SoftRIP Running Page

This page appears if SoftRIP is currently running and must be closed before installation can continue.
Close SoftRIP Button: Automatically closes the running SoftRIP application.
Cancel Button: Exits the installer without closing SoftRIP.
Manual Registration Codes Page
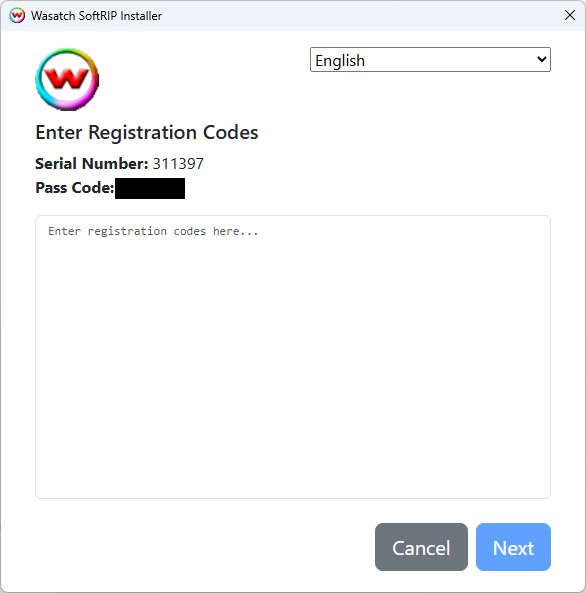
Serial Number Display: Shows your system's serial number.
Pass Code Display: Shows the pass code associated with your serial number.
Registration Codes Text Area: Enter your registration codes here, one per line. The Next button remains disabled until codes are entered.
Cancel Button: Returns to the previous page.
Next Button: Validates and processes the entered registration codes.
Download Page
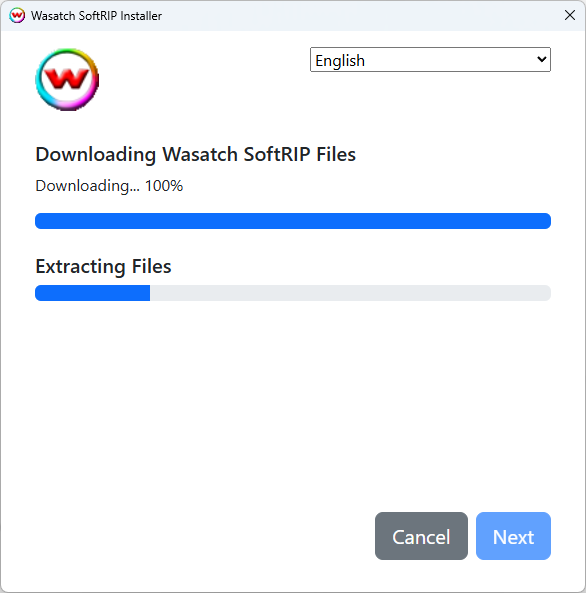
This page shows the progress of downloading and extracting SoftRIP installation files.
Download Progress Bar: Shows download progress with percentage and status text.
Extraction Progress Bar: Shows file extraction progress after download completes.
Cancel Button: Cancels the download and extraction process.
Installation Directory Page
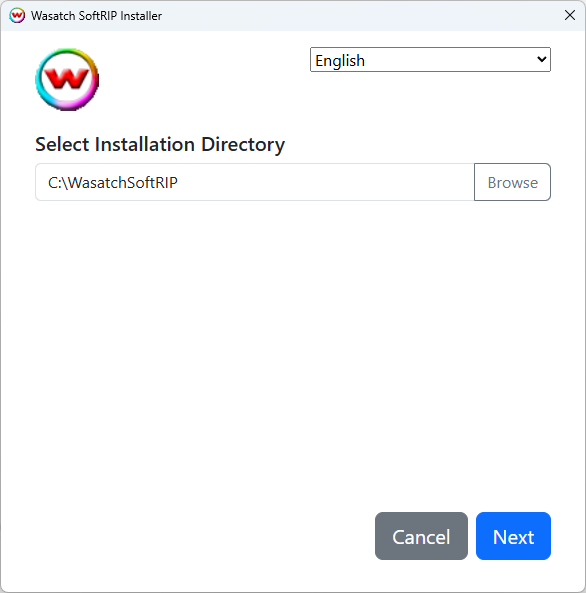
Path Text Field: Enter or edit the installation directory path. The installer validates this path.
Browse Button: Opens a folder browser to select the installation directory.
Error Message Area: Displays validation errors for invalid paths (appears only when applicable).
Cancel Button: Returns to the previous page.
Next Button: Proceeds with the specified installation path.
Language Selection Page
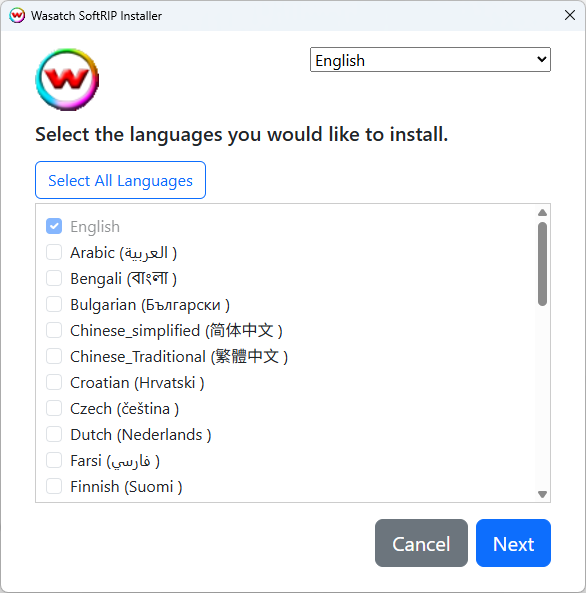
Select All Languages Button: Checks all available language checkboxes at once.
Language Checkboxes: Select which languages to install. English is always selected and cannot be unchecked.
Scrollable List: The language list is scrollable if there are many languages available.
Cancel Button: Returns to the previous page.
Next Button: Proceeds to install the selected languages.
File Installation Page

This page shows the progress of installing SoftRIP files to your system.
Installation Path Display: Shows where files are being installed.
Backup Progress Section: (Upgrade installs only) Shows backup creation progress before installing new files.
Copy Progress Section: Shows file copying progress with status text and progress bar.
Cancel Button: Cancels the installation and rolls back any changes.
Next Button: Becomes enabled when installation completes successfully.
Restore from Backup Page
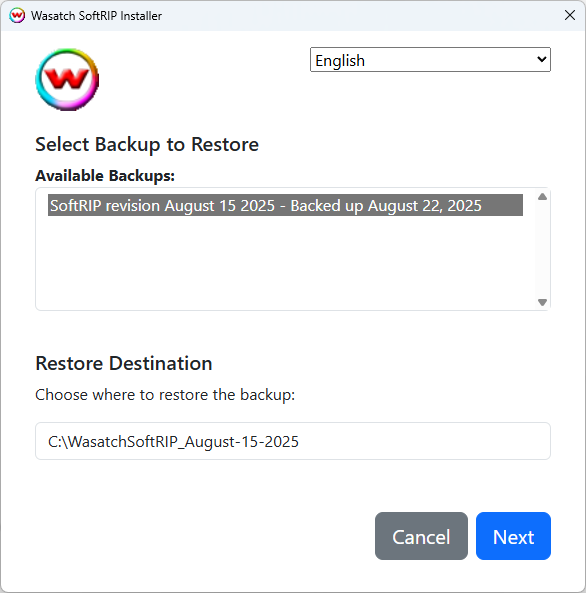
Backup Selection List: Choose from available backups. Shows backup date and SoftRIP build information.
Destination Path Field: Enter or edit where to restore the backup. A default path is suggested based on the selected backup.
Error Message Area: Displays validation errors for invalid destination paths (appears only when applicable).
Cancel Button: Returns to the welcome page.
Next Button: Begins the restore process with the selected backup and destination.
Restore Progress Page
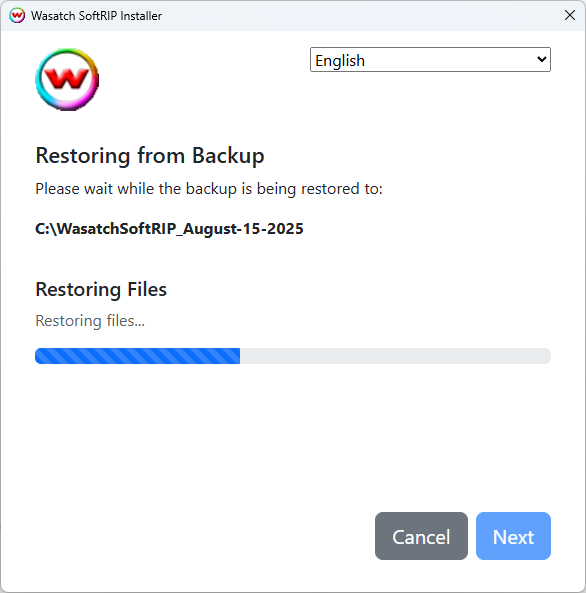
This page shows the progress of restoring files from a backup.
Destination Display: Shows where the backup is being restored.
Restore Progress Bar: Shows restoration progress with status text and percentage.
Cancel Button: Cancels the restore operation and cleans up partially restored files.
Completion Pages

Various completion pages appear depending on the operation performed:
- Product Installation Complete: Shows after successful SoftRIP installation
- Language Installation Complete: Shows after successful language installation
- Restore Complete: Shows after successful backup restoration
Website Links: Links to Wasatch website and support resources.
Done Button: Closes the installer.
Tips
- The installer automatically detects existing SoftRIP installations and offers appropriate upgrade options.
- During file operations, you can cancel safely - the installer will clean up any partial changes.
- Upgrade installations automatically create backups before installing new files.
- The backup files are located in the "backups" folder in the folder that Wasatch SoftRIP was installed (ie. wwrip81, WasatchSoftRIP, etc).
- Language installations can be performed on existing installations without affecting other components.
- The installer validates paths and settings before proceeding to prevent installation errors.