The installation of Wasatch Port Redirector creates a single 'generic' printer entry to create PostScript files in a single output folder. This 'generic' printer entry will be sufficient for most users.
However, if you would like to set up multiple printer entries to multiple output folders or if you need the specific page sizes available from a printer-specific PPD, you can follow the following set of instructions to install a printer-specific PPD.
1. Click on the Start button, select Settings, and choose Printers. Then double-click on Add Printer. This will bring up the Add Printer Wizard.
2. Choose Local Printer or My Computer, depending on your operating system.
3. It will now ask you which port to use. Choose the name of the Wasatch Port you created during Wasatch Port Redirector setup. If you did not create a Wasatch Port or would like to add or configure a current port, click on Add New Port or Configure Port. For more information on adding or configuring a Wasatch Port, see the topic Configuring Wasatch Ports.
4. The wizard will prompt you for a printer model. Browse to the PPDs folder that was previously downloaded using the link at the top of this page, then click on Have Disk. Choose the operating system you are using, and you will find a 'Printer.inf' file. Click OK, and then OK again. Now select the manufacturer and model of your printer.
5. Give a unique name to this printer by either accepting the name supplied, or providing another descriptive name. Click Next.
6. Continue through the wizard until it has finished. Typically, you do not want this to be your default printer, nor do you want to print a test page.
7. When the wizard is finished, it will install the Postscript Printer Driver. If it tells you that it is overwriting newer files, keep the newer files.
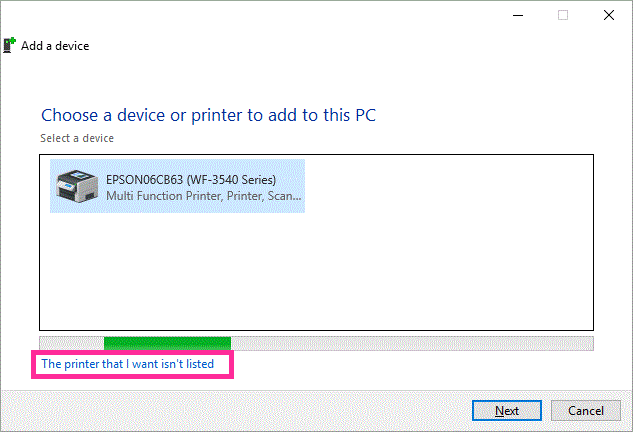
1. Open Control Panel. Choose Devices and Printers. Click on 'Add a Printer'. A window will open and start to scan installed printers. Click on 'The printer that I want isn't listed'. Press Next.
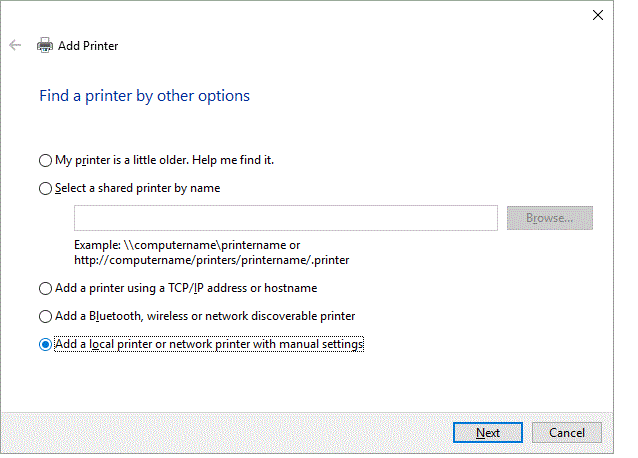
2, On the 'Find a printer by other options' window, choose the last option 'Add a local printer or network printer with manual settings'. Press Next.
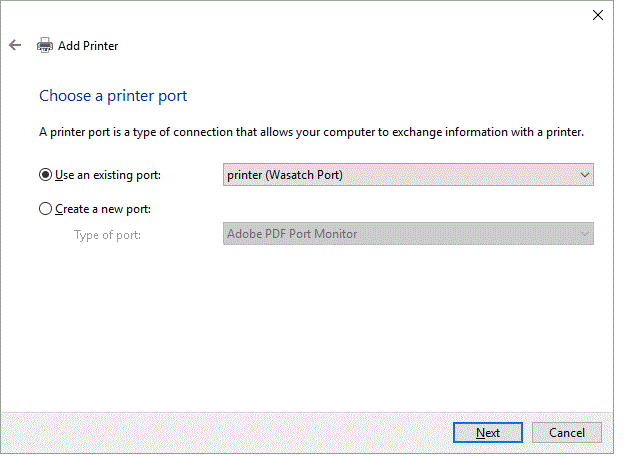
3. On the 'Choose a printer port' window, choose the 'Use an existing port' option. Click on the dropdown and choose the recently created Wasatch Port. For more information on adding or configuring a Wasatch Port, see the topic Configuring Wasatch Ports. Click Next.
4. The 'Install the printer driver' window comes up next. Click on the 'Have Disk' button.
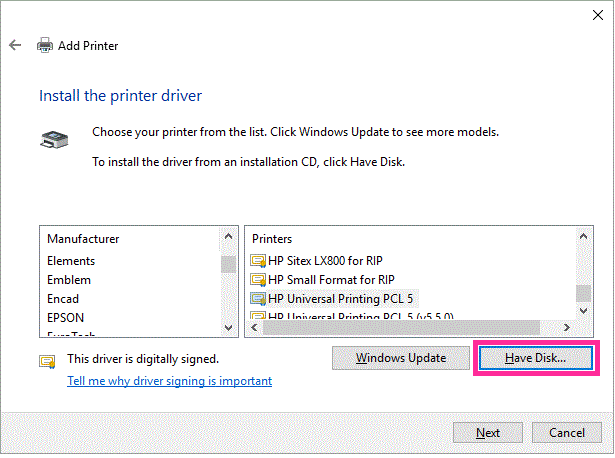
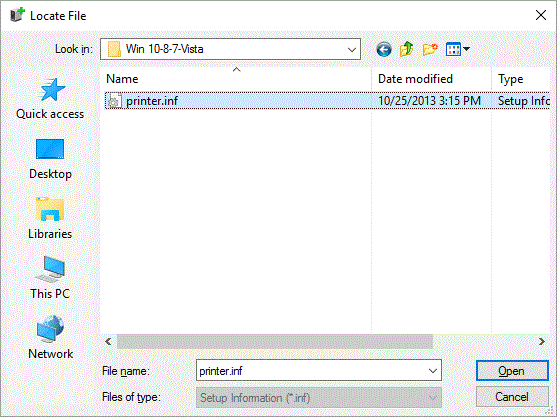
Browse to the PPD's folder that was previously downloaded using the link at the top of this page. Go into the folder labeled 'Win 10-8-7-Vista' and click on the printer.inf entry. Press Open, then OK.
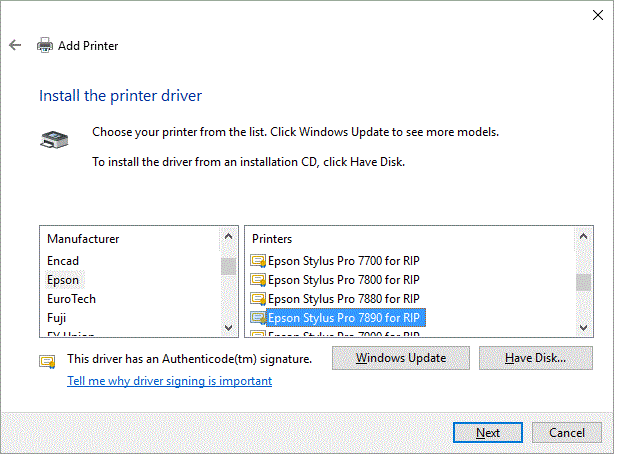
5. Once the printer.inf file is selected the 'Install the printer driver' will re-appear and you can choose your manufacturer of printer, then select the 'for RIP' entry that matches your printer. For example, the Epson Stylus Pro 7890 for Rip has been chosen in the following illustration. Press Next.
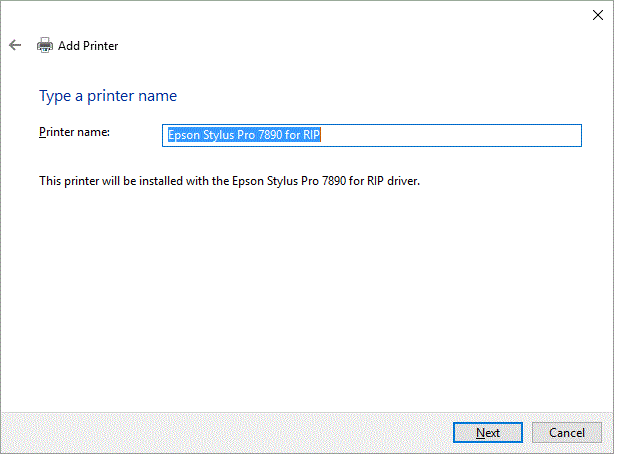
6. The next window 'Type the printer name' will display the For RIP printer name, unless it needs to be modified, Press Next.
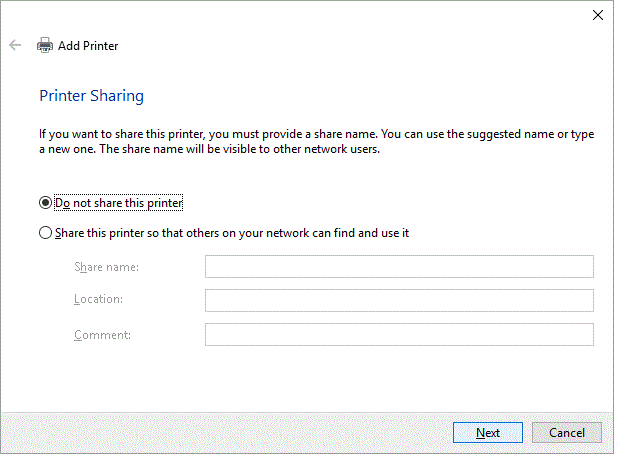
7. Select 'Do not share this printer' on the Printer sharing window. Press Next.
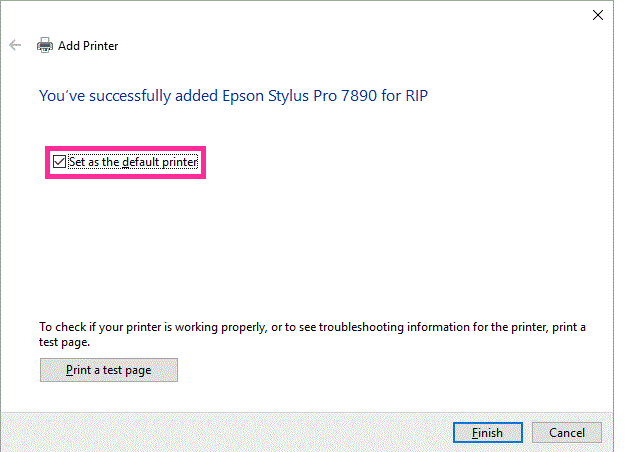
8. Once the printer driver is installed, you will get a window stating that the printer is installed, there will be the option to 'Set as the default printer', uncheck this option. Click Finish.