- Before printing to a Colordyne printer you will need to install the Microsoft Visual C++ components that can be found in your installation source in the misc\Microsoft folder. By default, the location will either be c:\wtemp\SRIP70\misc\Microsoft, or, if installing from a CD, misc\Microsoft from the root of the disc. Double click the .exe file that you find in that folder.
- For complex, very large files, or long runs that use expensive media, best practice is to make test runs on low-cost media first to ensure that the job runs to completion. Some jobs might require adjustment to compression in order to avoid failures during printing.
- The use of 'Annotations' is not supported when printing Layouts with this device, as this can cause the print spooler to crash.
Wasatch recommends using the Fast Layout feature with Colordyne printers. For additional details regarding the Fast Layout feature please see the Fast Layout help pages.
- Stitch Control is not available for the Colordyne CDT-1600/S printer
- The following Colordyne 1600C firmware revisions are currently supported with Wasatch SoftRIP:
- 20130829
- 20131219
- 20140912
- The following Colordyne 1600S firmware revisions are currently supported with Wasatch SoftRIP:
- 20130905
- 20140110
- 20140912
Print Mode Options:
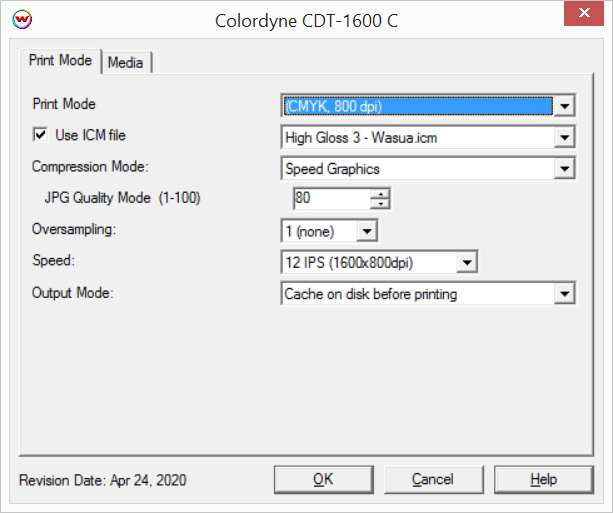
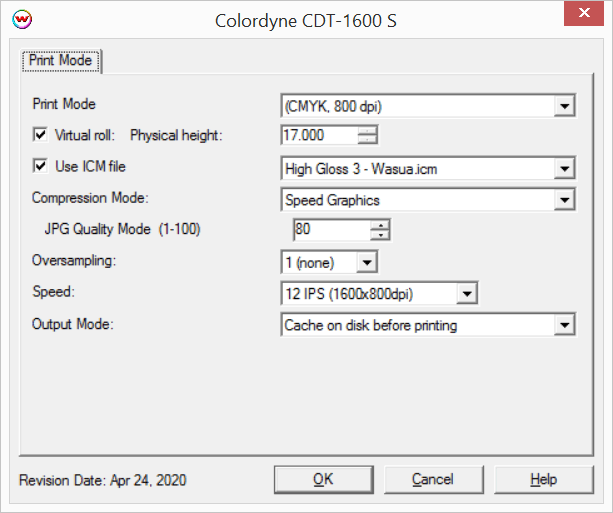
To launch the printer properties for this driver, choose 'Setup' from the 'Print' menu, then click on the 'Edit' button, and then click on 'Properties'.

- Print Mode: Select the rip resolution.
- Use ICM file: Specify ICM file to be used for dither control. Leave this control unchecked unless specifically instructed by otherwise by Wasatch service.
- Compression Mode: Set compression mode (there will be only one choice on normal installations). See the following link for more details regarding Compresison Modes and potential problems with complex image files. Memjet Compression modes
- Speed Graphics: Image data will be compressed based on the JPG Quality Mode setting.
- JPG Quality Mode: Set the quality mode (1-100).
- Oversampling: Set the oversampling value (1-4). Higher values make the RIP slower while improving image quality in some cases. This should normally be set to '1'.
- Speed: Set the print speed and print resolution (12 IPS 1600x800dpi or 6 IPS 1600x1600dpi).
- Output Mode: Set the method of spooling data.
- Cache on disk before printing: All print data will be written to the hard drive before spooling to the physical connection. This is the most reliable mode of operation, but does introduce a delay to the start of printing.
- Stream to physical connection: Data will be spooled to the physical connection as it is generated. Prints will begin quicker than 'Cache on disk before printing', although issues can be encountered if print data is difficult to compress. If print jobs fail with this Output Mode selected, change the setting to the default of 'Cache on disk before printing'.
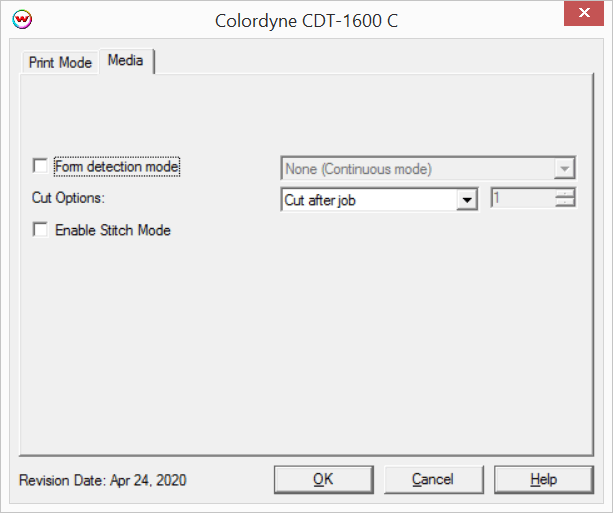
Media:

- Form detection mode: Set the detection type for converted or pre cut media.
- Label Edge: Uses transmissive sensor to find pre cut label edges.
- Pre-printed marks: Uses reflective sensor to find marks printed on reverse of label roll.
- Cut Options: Select cutting options.
- Off: Send no cutting commands.
- Cut after job: Once printing is complete the media will be cut.
- Sheets per cut: This value will set the number of pages to print before the media is cut.
- Enable Stitch Mode: Prints the entire image as a single page. Option only available when continuous printing has been selected.
 Colordyne CDT-1600 C / S Help Page
  Colordyne CDT-1600 C / S Help Page

