 Reggiani ReNOIR II Help Page
July 22, 2014
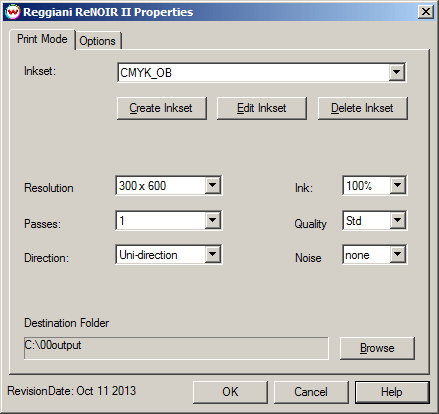
Print Mode:
To launch the printer properties for this driver, choose 'Setup' from the 'Print' menu, click on the 'Edit' button, and then click on 'Properties'.

- Inkset: Select which inkset to use. Choose "Starter Inkset" to create your own.
- Create Inkset: Create a new inkset.
- Edit Inkset: Edit the currently selected inkset.
- Delete Inkset: Delete the selected inkset.
- Resolution: Select the resolution for printing.
- Passes: Set the number of head passes used during printing.
- Direction: Select either Uni-direction or Bi-direction.
- Ink: Choose if the ink should be printed at 100%, 200%, or at 400%.
- Quality: Select the quality mode from either Std or Hi.
- Noise: The noise level can be set from none to 100%.
- Destination Folder: Allows you to select the folder you would like the output files to be saved in.
- Note: Because the output file will always be named the same as the original source file, repeated printing of the same job will overwrite all previous attempts of outputting that same job.
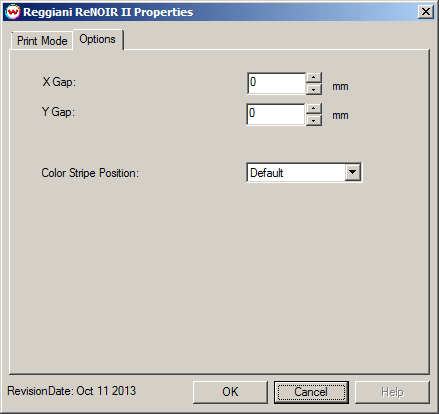
Options:

- X Gap: Select the X-axis gap in millimeters.
- Y Gap: Select the Y-axis gap in millimeters.
- Color Stripe Position: Select where Color Stripe will be printed.
 Reggiani ReNOIR II Help Page
  Reggiani ReNOIR II Help Page
