 d.gen Artrix/S - d.gen Artrix/GT - Teleios/GT
June 29, 2012
This Help page covers the following printers:
- d.gen Artrix/S
- d.gen Artrix/GT
- d.gen Teleios/GT
Usage
Pressing the Properties button next to the Printer Model window on the
Imaging Configurations screen will launch the control panel for this printer.
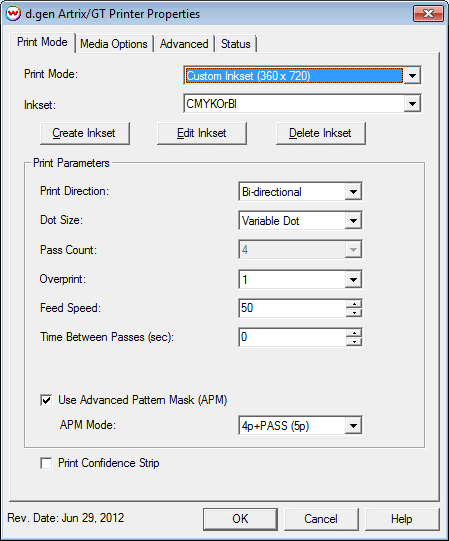
Print Mode:
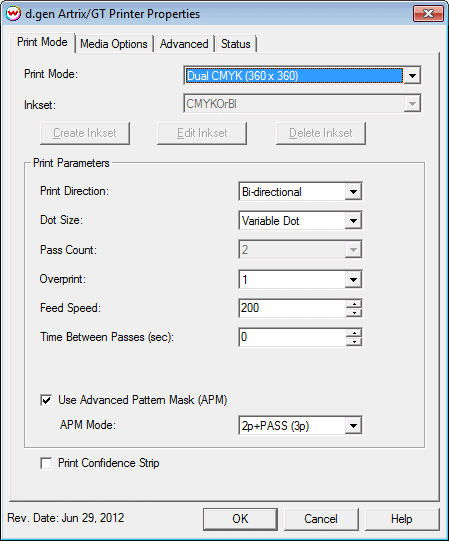
This page of the properties sheet allows you to select a Print Mode, and the
following print and media parameters:
- Print Mode: Choose resolution and ink sets.
- Print Direction: The head printing direction can be unidirectional or bidirectional.
- Dot Size: Various dot sizes can be selected. Not all dot sizes are available
for every resolution.
- Variable: Uses variable dots (the dot size varies dependent on required ink density),
and generally gives the best quality.
- Fixed Large, Medium, Small: Print with the dot size held constant, but at various ink densities.
- Pass Count: Allows you to specify the number of passes the head will make over a particular line.
A higher pass count has a better quality but a slower print speed.
- Overprint: The number of times each area is printed over. A setting of 2 would double the ink.
- Feed Speed: Allows the speed at which the media is fed between passes to be adjusted faster or slower.
- Time Between Passes: Allows you to specify the minimum time that a printhead pass will take.
This may be necessary to slow down the printhead when there are excessive drying problems, or when
printing separations onto film. For example, it may be necessary to increase the dot size to a larger
dot to increase the maximum density. If that higher dot size does not dry quickly enough on the media,
lowering the head speed and increasing the time between passes may slow down the printer enough for the ink to dry.
- Use Advanced Pattern Mask: If enabled, this control will use 'Advanced Pattern Mask' with the setting from the drop down menu below.
- Print Confidence Strip: Enable to print a confidence strip. Note: this control is only available for Artix GT model.
Media Options:
When you click on the Media Options tab, the following properties control panel will be displayed:
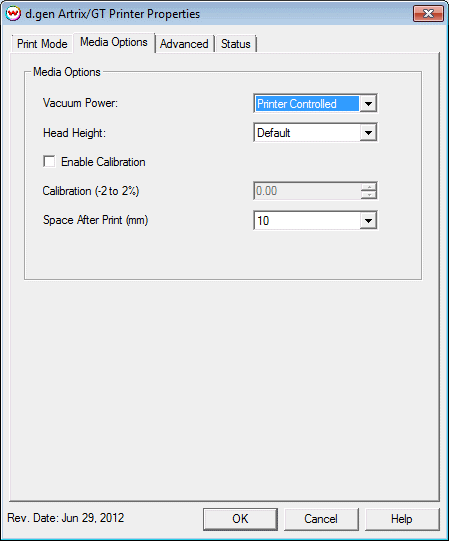
- Vacuum Power: Controls the suction on the media when printing. Media that tends to curl up
when printing may require the 'Strong' setting.
- Head Height: This specifies what the head height should be when printing on the loaded media.
If the physical head height is too low, a warning to change the head height will be displayed on the
front panel of the printer before printing, and the user MUST physically change the head height on the printer.
If the head height is higher than the software specifies, no warning will be given.
- Enable Calibration: If enabled, this compensates for slippage of the media when feeding the media forward.
- Space After Print: Set the space after print. This value is in addition to any margins that are set.
Advanced:
When you click on the Advanced tab, the following properties control panel will be displayed:
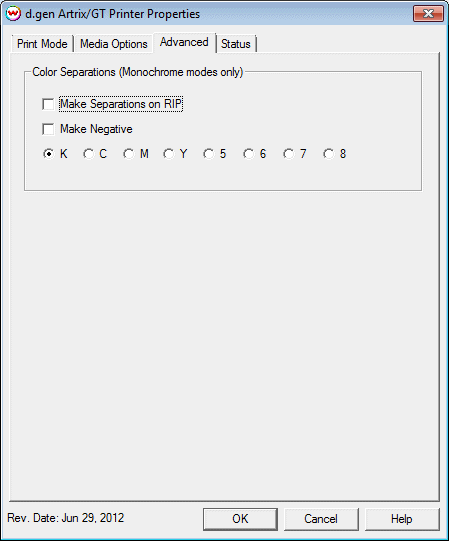
- The Color Separations controls are the same as those of other printers, and are only available
if a monochrome mode has been selected on the Print Mode tab.
- Separations on RIP: This will cause the RIP to separate the image into CMYK plates.
- Make Negative: This inverts monochrome images when printed.
- KCMY5678: This allows you to print monochrome images to any of the heads in the printer.
This is especially useful to eliminate overuse of a single printhead when printing only monochrome.
Status:
When you click on the Printer Status tab, the following properties control panel will be displayed:
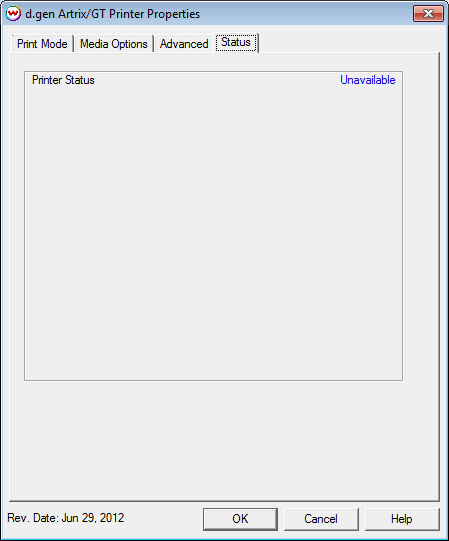
This window queries the TCP/IP address that is on the Set Up window, and returns its status, if available. If
a non-TCP/IP physical connection is selected, or if there is a problem connecting to that IP address, this
window will show the status as unavailable.
Hi-Fi Printing Using Non-Standard Inksets
If you have the special registration code TEXTILE enabled in Wasatch SoftRIP, you can create custom inksets for printing. When this variable is enabled, you will see the following screen when you press the Properties button:
The options for Hi-Fi modes will be added to the print mode box, and you will be able to select
non-standard inksets. You will also have the options to Create, Edit, and Delete inksets. For more
information see: Creating HiFi Ink Print Modes