 Mimaki TxF150 / TxF300
June 5, 2024
Physical Connection Setup:
Before connecting the printer to the PC, the Mimaki Driver needs to
be downloaded and installed. It can be obtained from the Mimaki web
site here.
It is highly recommended to review the Operation Manual, which can be
obtained from the same link as the Mimaki Driver. Section 1.3,
"Connecting a PC to the Product" starts on page 36. There are special
notes for both USB and ethernet connections that must be followed when
setting up the printer for successful communication.
The Mimaki Communication Driver is required for USB and Ethernet
connections. When setting up the network connection in the SoftRIP
TCP/IP Spoolers, change the standard port 9100 to be port 11110 instead.
Print Mode Options:
Pressing the Properties button next to the Printer Model
window on the Imaging Configurations screen will launch the control
panel for this printer.
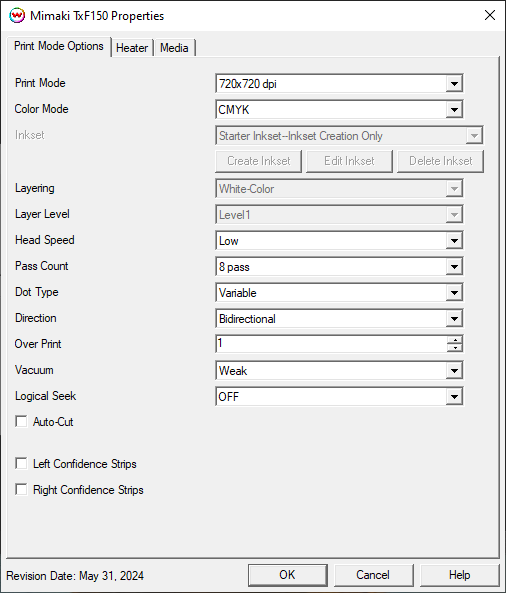
This page allows you to select from the following parameters:
- Print Mode: Set the resolution for printing.
- Color Mode: Select the inkset to use during printing. If using a custom inkset is to be used, then the inkset the printer was set up with needs to be selected.
- Inkset: When the Color Mode is set to one of the 'Custom Inkset' choices, then a custom inkset can be created or used for printing.
- Create Inkset: Create a new custom inkset.
- Edit Inkset: Edit an existing custom inkset.
- Delete Inkset: Delete an existing custom inkset.
- Layering (TxF150 Only): Shows the layering order for the White ink channel.
- Layer Level (TxF150 Only): Set the layer level for printing.
- Head Unit: Select to print with Head 1, Head 2, or both Heads 1 and 2.
- Head Speed: Choose to have the head travel at a high speed or low speed. This option is not available in all pass counts.
- Pass Count: Allows you to specify the number of passes the head will make over a particular line. A higher pass count has a better quality but a slower print speed.
- Dot Type: Choose either a variable dot or fixed dot for printing.
- Direction: Select to print with either Unidirectional or Bidirectional.
- Over Print: Prints over the printed area the selected number of times. For example, if 2 is selected, the amount of ink laid down is doubled. The maximum value is 9.
- Vacuum: Set the strength of the media vacuum on the printer to Weak, Standard, or Strong.
- Logical Seek: Turn on option for print head to move the width of the image or turn off for print head to move the entire width of the printer, with each printing pass.
- Auto-Cut: When selected, the media will be cut off after the print.
- Left / Right Confidence Strips: Choose whether to print color strips along the left or right edges of the output.
Heater:

- Use Printer Front Panel Heat Control: If enabled the printer will use the settings from the front panel of the printer, otherwise the controls below can be used.
- Pre Heater: Warms the media before is passes over the platen.
- Print Heater: Warms the media under the print heads
- After Heater: Warms the media after printing
Media:
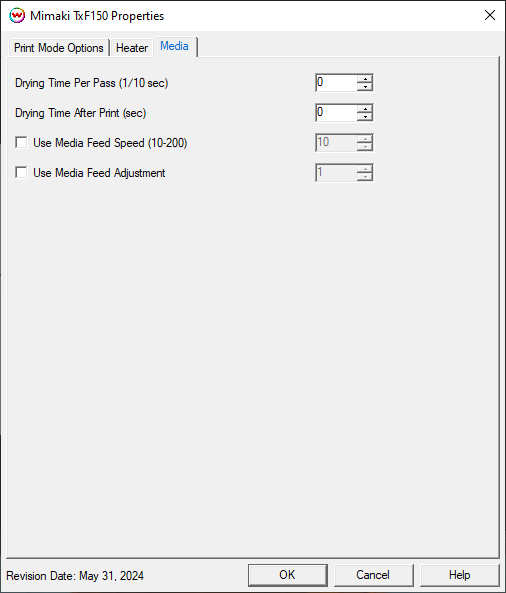
- Drying Time Per Pass (1/10 sec): Add additional drying to each head pass.
- Drying Time After Print (sec): Set the number of seconds the printer waits at the end of the print.
- Use Media Feed Speed (10-200): When selected, the front panel setting for the speed that the media is advanced will be ignored and the new value will be used.
- Use Media Feed Adjustment: When selected, a value from -9999 to 9999 can be entered to adjust the distance between head passes. A value of 60 is approximately equivelant to 0.1 mm.
Auto-Generation:
- Specific information about the Auto-Generation options can be found HERE