January 14, 2016
Print Mode:
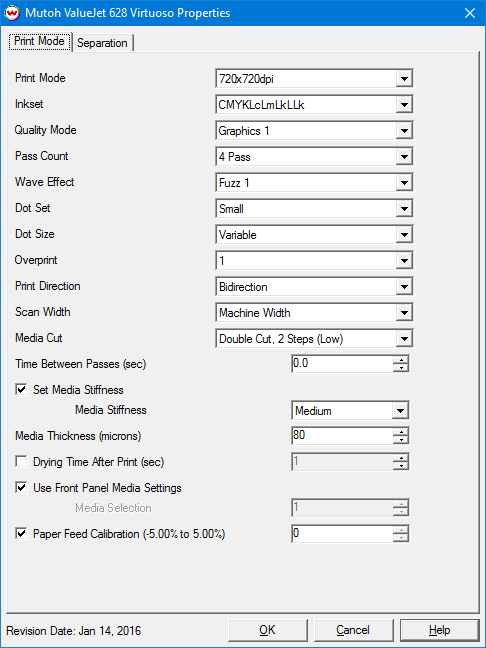
Pressing the Properties button next to the Printer Model window on the Imaging Configurations screen will launch the control panel for this printer.

- Print Mode: Choose resolution for printing.
- Inkset: Select the desired inkset to use.
- Quality Mode: Displays the current quality mode of the printer.
- Pass Count: Select pass count. Will vary depending on Print Mode selected.
- Wave Effect: Select the wave pattern to print with. Can help with head banding.
- Dot Set: Choose to print with the Small, Medium, or Large dot set.
- Dot Size: Select the size of the Fixed dot to print with, or use Variable dot. Works in conjunction with Dot Set.
- Overprint: Select the number of times the printer prints over the printed area. For example, if 2 is selected, the amount of ink laid down is double. The maximum value is 9.
- Print Direction: Print in Unidirection (one direction) or Bidirection (both directions).
- Scan Width: Choose if the print head should travel the width of the image, the width of the media, or the width of the printer.
- Media Cut: Select to enable cutting after print. Can set single or double cutting, as well as, how many cuts are used.
- Time Between Passes (sec): Allows you to specify the additional time that the printhead will pause after each pass.
- Set Media Stiffness: Select Low, Medium, High, or OFF to control the amount of media suction.
- Media Thickness (microns): Set the appropriate media thickness in microns. The conversion of microns to millimeters is: 80 microns = 0.08 mm
- Drying Time After Print(sec): Additional drying time can be set after the print is completed.
- Use Front Panel Media Settings: Allows one of the printers predefined front panel Media Settings to be selected, without having to switch the front panel over to this media setting.
- Paper Feed Calibration (-5.00% to 5.00%): Check to allow setting the paper feed calibration value.
To find the Paper Feed Calibration Value:
- Print a line that is 1000 mm long in the paper feed direction
- Measure the actual printed distance
- Enter the difference as 1/10th millimeters. For example, enter 1.5 the measurement of the print is 985 mm.
Separation:
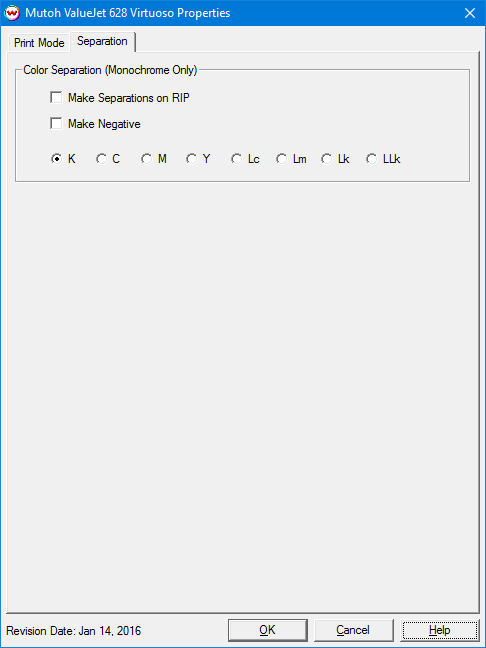
When you click on Separation, the following window will be displayed:

- Make Separations on RIP: This will cause the RIP to separate the image into CMYK plates.
- Make Negative: This inverts monochrome images when printed.
- K, C, M, Y, Lc, Lm, Lk, Llk: This allows you to print monochrome images to any of the printheads. This is especially useful to eliminate overuse of a single printhead when printing only monochrome.
[ Wasatch Home ]

