Variable Data Printing's Auto-Data Feature makes it easy to enter large amounts of repetitive data into the database. This is especially useful when you would like to enter a single repeating value across a range of records, or if you would like each record to have a sequential numeric value.
For example, let's create a sample variable data job--a plain white sticker that contains a model and serial number.
For this example, we'll create a blank background image. To do this, make sure no image is open in Wasatch SoftRIP before launching Variable Data Printing. Launch Variable Data Printing, and specify 4 inch x 3 inch as the size of our new label. When you press okay, you'll see the following screen:
![]()
Create two fields, one for model number and one for serial number. Your screen should then look like this:
![]()
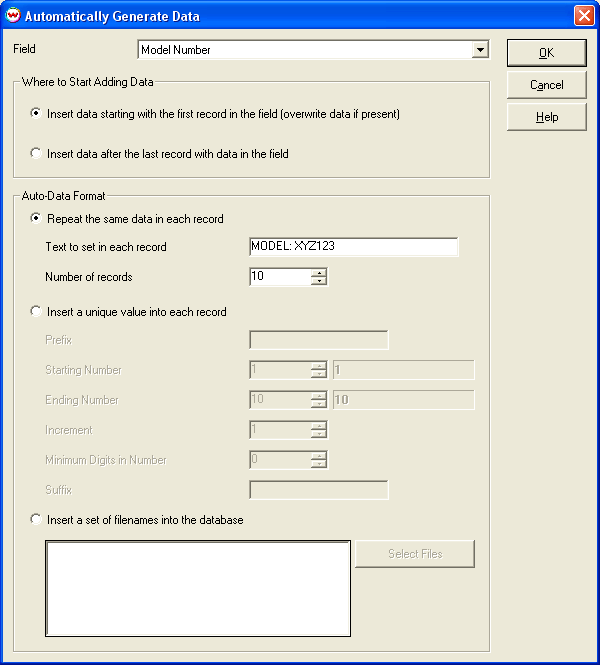
Now we would like to add 10 records. For each of these, the model number is the same, XYZ123. However, the serial numbers are in sequence, from SST001-N to SST010-N. To add the model numbers, click on Database, then Auto-Data (or on the column header of Model Number). Select Model Number for the field in which you would like to add data. Since no data is present, we want to add data starting with the first record in the field. If data was already present, we would want to add data after the last record.
Select Repeat the same data in each record. Type in the text we want to show up in the Model Number field: 'MODEL: XYZ123' and the number of copies (10). Click on OK.
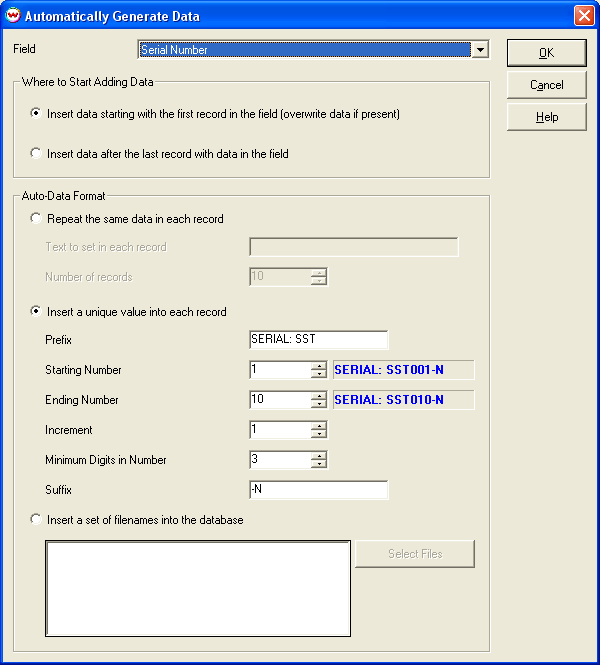
To add the serial number, click again on Database, then Auto-Data. Select Serial Number for the field, and Insert a unique value into each record.
Since we want to add something before the numeric portion of records in this field, enter 'SERIAL: SST' in the Prefix box. The numeric portion is going to go from 1 to 10, 1 at a time, so the starting number is 1, ending number is 10, and increment is 1. We want the numeric portion of the serial number to be the same number of characters, regardless of whether we enter 1, 10, or 100, so we can specify the minimum number of digits for the number--in this case 3. We also want to add something after the number, in this case '-N'.
As you enter data onto this screen, you can see what you'll get in the box next to the starting number and ending number.
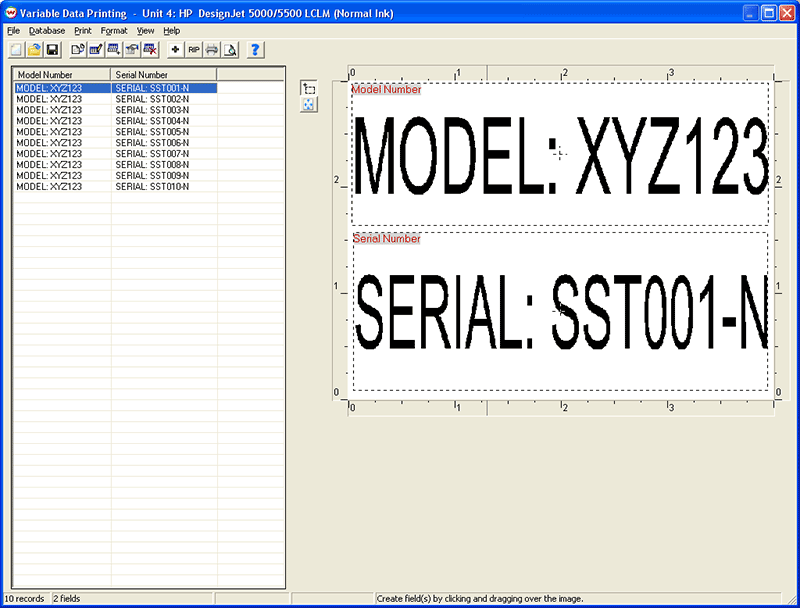
When you click on OK, this data has now been entered into the database.
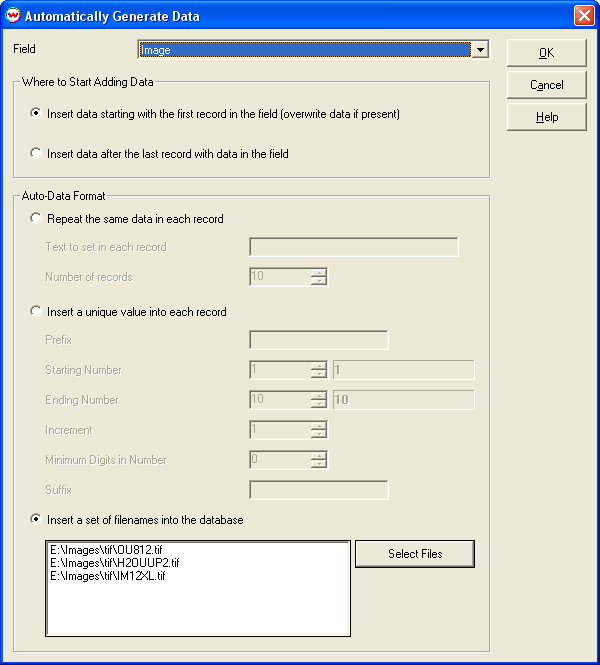
Using Auto-Data to Add Image Paths
You can also use the Auto-Data feature to add image paths to a database. On the Auto-Data window, click on Insert a set of filenames into the database, then Select Files. You can then select either one file or multiple files (using Ctrl and Shift), and click on Open. These filenames will be added to the end of the list. When you click on OK, these filenames will be added to the database.