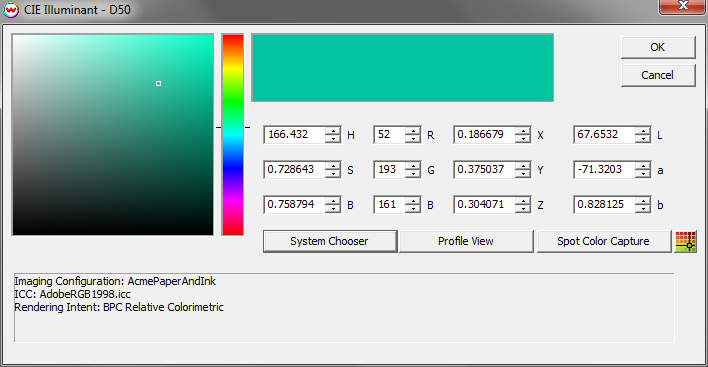
Illustration 1: Select a Target Color
Inaccurate imaging configurations and color profiles are often used in real-world workflows. Sometimes this is because of the difficulty of accurately measuring specialty surfaces, such as heavily textured textiles, with inexpensive spectrophotometers. Sometimes it is a deliberate decision, as when bright "stretched" input profiles are used to create "punchy" color that is bright rather than accurate.
On occasion, it is necessary to match spot colors within such an inaccurate color configuration. The Wasatch "Color Atlas Generator" is a popular tool for creating custom "swatch books" to address the problem. On occasion, a more targeted tool is needed, and that is the purpose of the "Color Neighborhood" tool.
This tool allows for the creation of a 100-patch test pattern. The test pattern samples an approximiately spherical region of color space centered on a target color. The color patches are sorted to put the lightest patch at the upper left, and darkest at lower right, with the target color roughly in the middle rows.
Launch this tool from SoftRIP's "Color" menu. After you click on "Color Neighborhood", you will see the following screen:
Illustration 1: Select a Target Color
This screen can be used to specify a target color, which may be an RGB value from a Wasatch "Color Atlas", or a direct measurement made with a supported spectrophotometer.
On this screen, RGB and Lab spaces are connected though the RGB Vector Input profile and rendering intent of the current Wasatch Imaging Configuration.
Once the target color is specifed, and 'OK' pressed, you will see this screen:
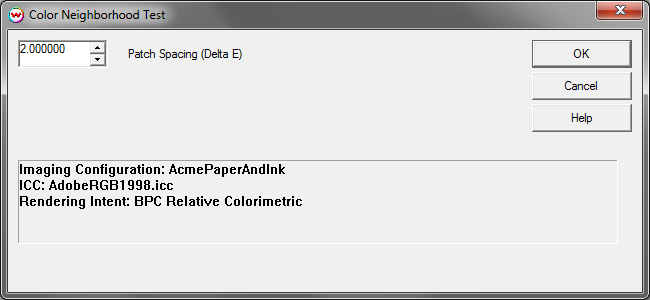
Illustration 2: Select Patch Spacing
Small values of "Patch Spacing" will cause the test pattern to sample a small region of color space around the target color. All 100 of the patches will be very similar in this case.
Large values will sample a larger region, and make the patches more variable with a greater difference between each patch. It can be useful to start with a larger region, and then use the RGB values from that test pattern to re-center a new test pattern to sample the region of color space more precisely.
Upon pressing "OK", you'll be prompted to save the new test pattern file on disk, where you can then open it for printing. The example below has Patch Spacing set to 4.0 Delta E, sampling a wide range of colors around the target.

Illustration 3: Sample Test Pattern
As stated above, the color patches are sorted in Lab order, to put the lightest patch at the upper left, and darkest at lower right, with the target color found roughly in the middle rows.