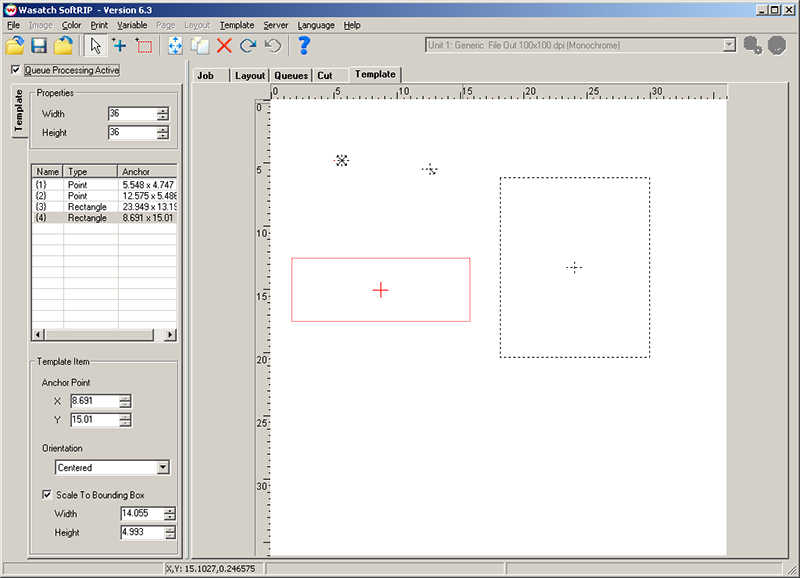
Illustration 1: A template with several items in it
The Template tab is for users who use the Layout tab extensively and often repeat the positioning of images in a layout. It is also useful for workflows where the position of images must always be in the same location, such as T-shirt printing or other industrial printing applications.
The tools to create and modify templates can be accessed through various methods to suit user preferences, including main menu options, right click menus, tool bar buttons, and hot keys.
If the Template tab is not already active, you can enable it by clicking on the Template menu, then on Show Template Editor.
Start by setting the size of the template to the maximum width and height for your media. You can then start adding items into the template. Items in a template are specified relative to the upper-left corner, and control how images will be placed inside of the Layout tab.
The items in a template correspond to the locations where images will be placed in a layout. They can either be anchor points, to which an image will be oriented, or a rectangle, to which an image will be scaled.
To add a rectangle box to an image, click on the plus icon on the toolbar (or hit Ctrl-P). When you click inside the template, a new anchor point will be created. You can select the exact location of this point or how images will be oriented to it on the left side of the window.
To add an anchor point to an image, click on the rectangle icon on the toolbar (or hit Ctrl-R). When you click and drag a box inside the template, a new rectangle will be created. You can select the exact location of the anchor point in this box, its orientation, and the exact size of the rectangle on the left side of the window.
Illustration 1: A template with several items in it
You can move any item that you place by selecting the pointer icon on the toolbar (or hit Ctrl-Shift-S). Simply click and drag any item to move it. You can make multiple selections by holding Ctrl or Shift as you click, or by clicking outside any item and dragging a box around several items.
You can also add items to the template by clicking on Template, Add Template Item (or hit Ctrl-+). From that window, you can set the anchor point, size, orientation, and various other options. You can also add more than one item at a time, by selecting a number greater than 1 for Number Across or Number Down. The Interval will specify how far apart these anchor points or rectangles will be.

Illustration 2: The add template window
If you would like scaling only to occur if the image is larger than the rectangle itself, click on Scale Only If Outside Box. If you would like images to be automatically rotated when an image is dragged into a rectangle, select Rotate For Better Fit. And Crop For Better Fit will scale and automatically crop an image when it is dragged into a rectangle. The crop will be placed in the center of the image. You can change the area of the crop by clicking on Size/Crop in the Layout tab after an image has been applied.
Assigning a name to a template item is optional, but can be useful to keep track of which image should be assigned to which template item in a layout. The name will show up on the status bar when you move the mouse over a template item. For rectangles, the name will be also displayed inside the rectangle itself.
You can access that menu for any template item by double-clicking on the item, or by right-clicking, and selecting Properties.
You can open a template by clicking on File, then Open. When you have finished working on your template, you can save it by clicking on File, then Save. The following screen will appear:
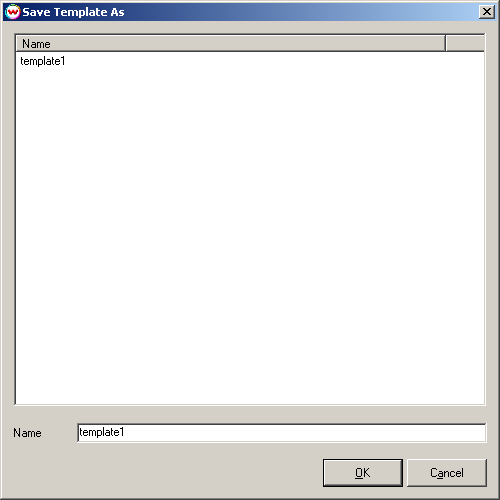
Illustration 3: Saving a template
SoftRIP provides additional tools to streamline the process of manually manipulating templates. For these tools, the primary selection (indicated by a solid red outline) will be the image to which the other selected images (shown with dashed red outlines) are aligned or sized. Note that some of these tools are only available when multiple images are selected.
When you have finished creating a template, click on the Template menu, then Apply Template. The template will then appear on the Layout tab. You can also load a template into the Layout tab directly by clicking on Template, and Apply Template while on the Layout tab.
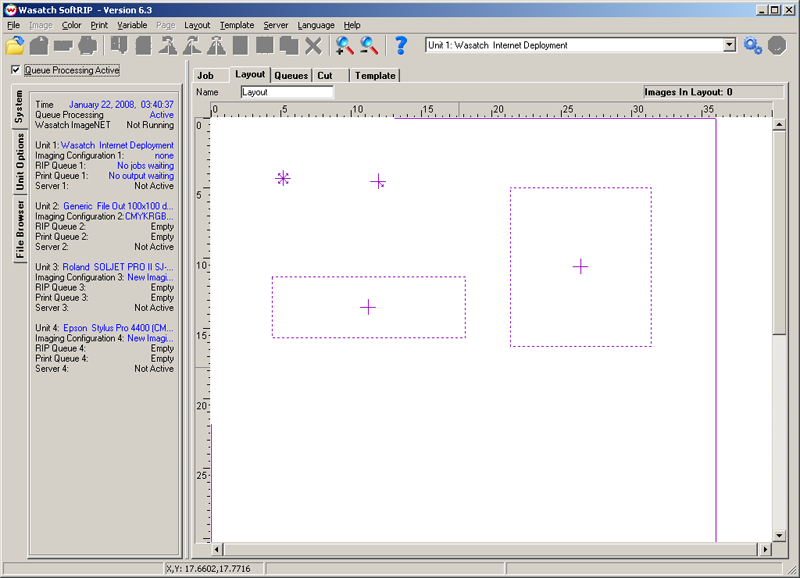
Illustration 4: A template loaded on the Layout tab
You can then drag images onto the Layout tab, and the images will automatically be snapped to the locations of the template items. If you drag an image onto a specific item, that image will be placed on the item. Otherwise, the images will be placed on items in the order they were created in the template. You can only have as many images in a layout as the number of items in the template.
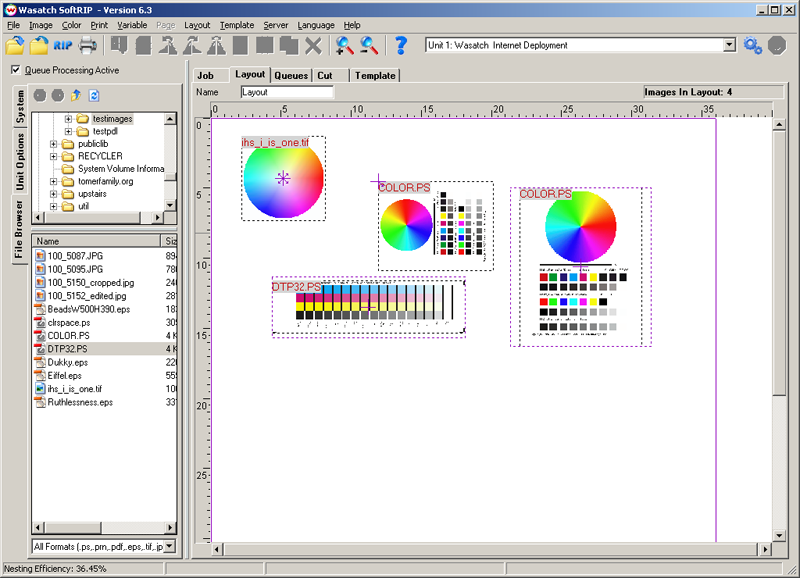
Illustration 5: Images snapped-to the template
If you have a pre-existing layout, you can save the relative positions of each of the items in that layout as a template. You can then apply that template to layouts with different images. From the Layout tab, select Template, and Create Template From Layout. A snapshot of the current layout will be saved as a new template.