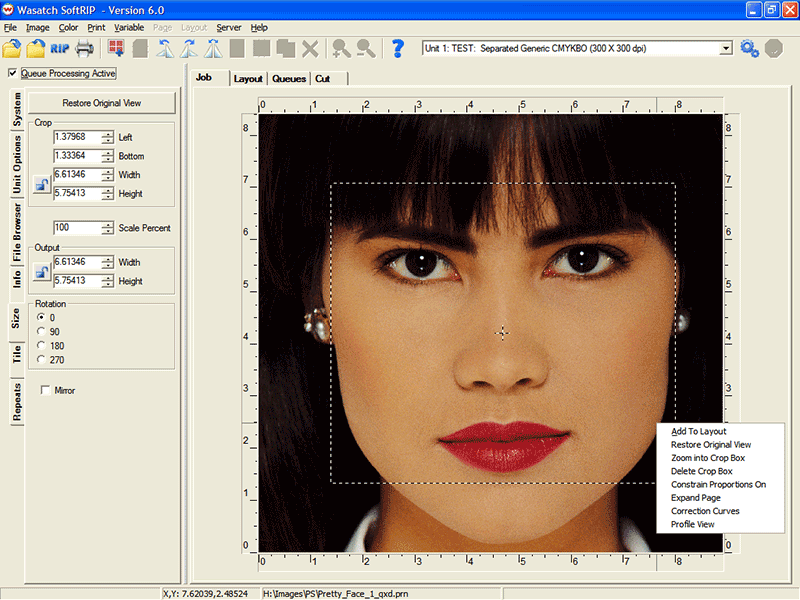
Illustration 1: The Size Tab with marquee box indicating crop area
SoftRIP gives you the flexibility to prepare images for printing individually or as part of a layout.
Details on preparing files to print using the layout tab are included in the discussion Working with Layouts discussion. The Size tab as discussed below is not accessible when the Layout tab is active. If you right click on an image on the Layout tab and select Size/Crop, SoftRIP will transfer the image to an Image from Layout tab. In this view, the Size tab is enabled and file preparation tasks can be carried out according to the instructions below. To accept changes and return the image to the Layout tab, click the Update Layout button. The image returned to the layout will automatically update with the changes.
Whenever a file is opened in the Job tab, the Size tab appears in the left tab set. The Size tab is separated into five general areas: Crop, Scale, Output, Rotation, and Mirror.
Illustration 1: The Size Tab with marquee box indicating crop area
Size and Crop functions will act differently depending on whether or not you have turned on Constrain Proportions. When proportions are constrained, resizing will maintain the aspect ratio of the original image. Clicking on the Lock button will toggle between Constrain Proportions on (lock closed) and off (lock opened). You can also change this setting by right clicking in the image preview and clicking on the Constrain Proportions option.
To change the output size of an image, you can either enter a percentage to scale up/down the image size, or enter a specific value for width or height. When you enter a value in the Scale Percent window, the resulting dimensions will display in the Output windows for Width and Height.
To resize by entering dimensions, set Constrain Properties to on and enter the desired Width or Height. SoftRIP will automatically compute the resulting scale percentage and reflect the other dimension (either Width or Height) in the appropriate window.
For either resizing technique, the original dimensions of the image will be displayed in the Crop Width and Height windows. In the Preview window, the ruler bars will update to show the new sizing of the image and a dashed crop box will appear around the entire image.
If your resized image is larger than your paper width, SoftRIP warns you by marking the overage with a red and black flashing crosshatch. Rotating the image may successfully fit your image within the printable area. Also SoftRIP includes a Tiling tool for splitting oversized images into panels to be reassembled after printing is complete.
The Crop tool lets you select an area within your original image to RIP and Print. You can create a crop box by clicking on the image preview and dragging your mouse to create a box. Drag the borders of the crop box to change the shape or size of its outline. To reposition the crop box, click inside the crop box and drag it to its desired location.
To create a crop box proportional to the original image, set Constrain Proportions to on and double click in the Output area’s Width or Height windows. This will create a marquee around the full image. Now when you resize the crop box your resulting marquee will remain proportional.
You can enter crop box dimensions numerically by setting constrain proportions to off, and entering dimensions in the Output area Width and/or Height window(s). You can define your crop box’s location numerically by entering values in the Crop area Left and Bottom windows. Positioning values will offset the crop box from the bottom left corner based on the unit of measure you have selected in the Preferences menu.
When you RIP and Print with a crop box activated, only the cropped area will be processed. To remove a crop box, right click in the image preview and select delete crop box.
When you have created a crop box, you can right click on the image preview and select Zoom Into Crop Box to eliminate the image area outside the marquee. The will allow you to zero in on specific elements of the image (Illustration 2). This feature is especially useful for color correction and spot color replacement. Selecting Restore Original View will zoom back out to the original image.
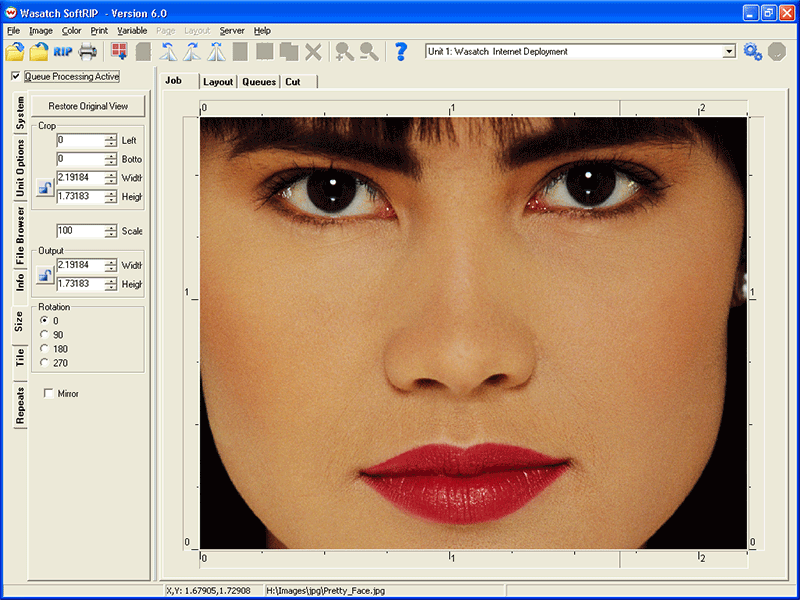
Illustration 2: Zoom into crop box
The rotation radio buttons on the size tab turn the image in 90 degree increments. The radio button rotation values turn the image counter-clockwise and are not cumulative. The value you select will be applied based on the original position of the image. You may also use the tool bar buttons to rotate the image 90 degrees to the left or right.
Checking Mirror on the Size tab (or the Mirror button on the tool bar) flips the image along the center vertical axis. This is primarily used for printing backlit transparencies or other second surface applications. It is also used for applications such as dye sublimation in which the images will be transferred to another substrate such as fabric.