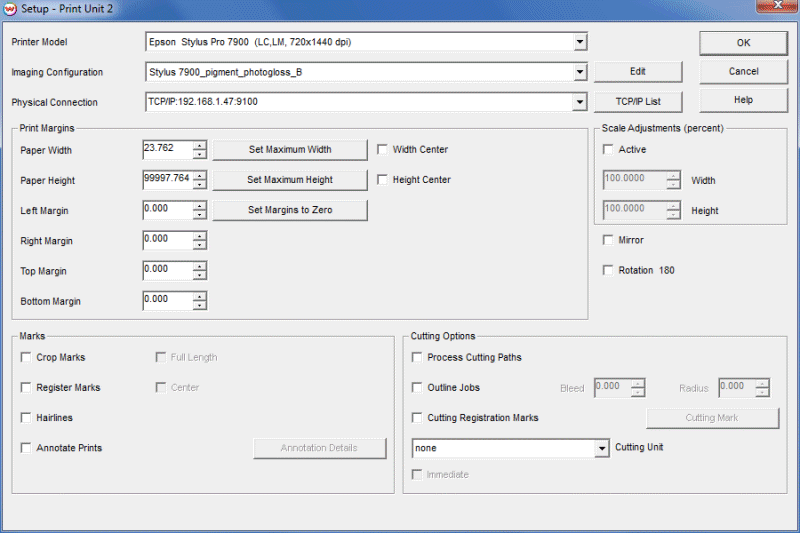
Illustration 1: The Setup Menu
The SoftRIP Setup screen lets you configure your printer and color settings. Details on how to use this screen for selecting your printer model, imaging configuration, and physical connection are located in the Getting Started section of this guide.
Begin by selecting one of the available print units from the drop down window at the top right of the main screen. This will define the print unit you will be configuring when you launch the Setup screen (Illustration 1), from the main Print menu at the top. After choosing your Printer Model and Imaging Configuration, select the Physical Connection by which Wasatch SoftRIP will communicate with your printer. Additional setup options are detailed below.
Illustration 1: The Setup Menu
Control for the cutting functions in SoftRIP's optional Contour Cutting feature. These settings are grayed out unless you have enabled the optional Contour Cutting module.
Some key print unit settings are located on the main window Unit Options tab (Illustration 2) for easy access. These settings are print unit specific, and you can change between units by clicking the unit number buttons on the tab itself. The controls on this tab are detailed below.
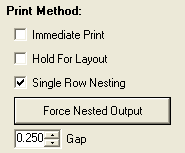
Illustration 2: Print Method Options
Checking the Immediate Print box will start sending output to the printer as soon as the RIP begins producing dots. When this box is unchecked, printing will begin only after the entire image has finished ripping. With Immediate Print, the device may pause during printing while it waits for data from the RIP. With some printers this may cause problems with print quality. Immediate Print is not an available option when printing layouts.
When Hold For Layout is checked, jobs will not begin printing from the Print Queue until they are sent to print as part of a layout. Jobs held can then be included in layouts individually, or you can click the Layout Queued Job(s) button above the Print Queue to send all jobs listed with quantities to print to the layout screen. Learn more about SoftRIP's time and media saving nesting options in the layout section of online help. Note that checking this control will only suppress printing of individual jobs; layouts will not be held from printing.
This automated nesting feature helps to save media without requiring the user to trigger the printing process. Jobs sent to print will be held until enough images have been queued up to fill the width of the media. Setting a value in the Gap window will determine the distance between nested images. To trigger jobs nested in the row to print before the full width is achieved, click the Force Nested Output button.
The settings in the Marks section are also located on the Setup screen, and are detailed above.
To create a print, SoftRIP will first RIP your image and then transmit it to the printer. Completing this process is as easy as clicking the printer button on your tool bar. A PostScript Interpreter bar launches on your Task Bar during ripping, and then a Print Spooler will launch as the data is sent to the printer. Clicking on the Interpreter or Spooler will open windows showing the progress of the job.
|
To add a job to the RIP Queue to be processed later, select Add to RIP Queue from the Print menu. It will be added to the RIP Queue but not ripped.
To RIP a job without printing it, select RIP Only from the Print menu or click the tool bar RIP button. On the Queues tab you will see the Job Name appear as a new line in the RIP Queue with an R in the RIP column. When all queued jobs above it have ripped, the job will begin processing changing the RIP column to zero and launching a Postscript Interpreter window in the Task Bar. When the Postscript Interpreter processing completes the job will show up as a new line in the Print Queue with a quantity of zero.
When you select RIP and Print from the Print menu or click the printer button on the tool bar, SoftRIP will process the job as above except it will appear in the Print Queue with a quantity of one. If you have not checked any special Unit Options to delay printing, your job will begin transmitting to your output device as soon as queued jobs above it have completed.
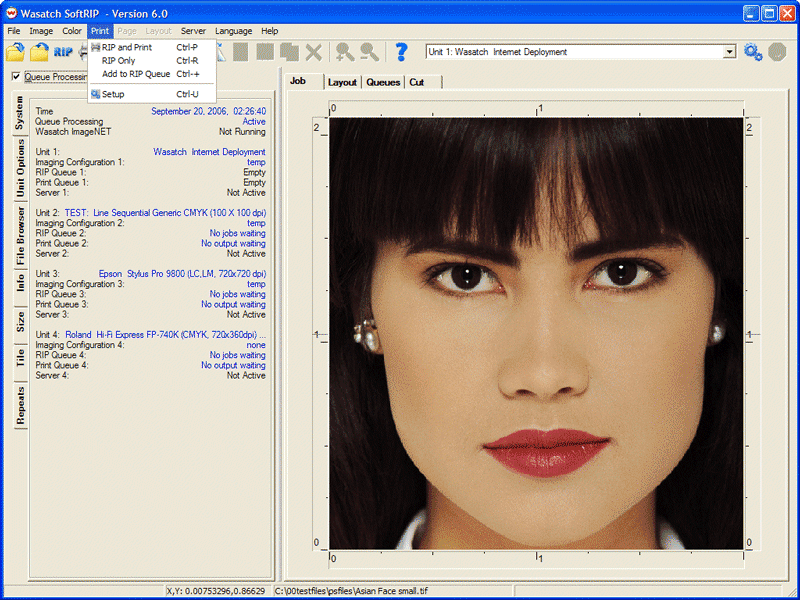
Illustration 3: Main Print Menu
When a layout is submitted to RIP, Wasatch RIPs each image separately. An entry for the entire layout will show up in the Print Queue and new RIP Queue entries will show up for each unripped image in the layout. The layout entry in the Print Queue will not be available to view or print until all images in the layout have been ripped.
When you select RIP and Print from the main menu, the entry for the layout in the Print Queue will have a quantity of one. When all jobs have ripped the layout will be sent directly to the printer. The Hold for Layout setting on the Unit Options tab will not stop full layouts from printing.
If the layout contains jobs that have already been ripped, they will not be ripped again. Sometimes you may have copies of an unripped image within a layout that are non identical, with one copy rotated or resized. A new RIP Queue entry will be made for each unique configuration of the image.
Layouts become invalid if any of their individual component files are removed from the Print Queue. If you delete a Print Queue entry used in a layout you will be warned that the job is part of a layout and that removing it will make the layout invalid. If you click Yes to proceed, you will not be able to re-access the invalidated layout.
The main Queues Manager (Illustration 4) helps you control the real-time status of every job in your print production workflow. Check the Print Unit boxes at the top of the tab to select which printer queue(s) to view. Clicking on the two Blue Gears button above a RIP Queue will launch the Setup screen for that print queue.
NOTE: The display of thumbnails and colors can be changed from the File menu, in the Preferences area.

Illustration 4: The Queues Tab
If an image does not require any file preparation, you can Drag and Drop it directly from the file browser tab to a RIP Queue. You will be asked whether or not you would like to generate a preview. If you select to not generate a preview, the image will display as Preview not available when added to a layout.
You can also Drag and Drop the entries between Queues, for faster processing. Any time you drag an entry to a print unit that does not have an identical setup, you will be informed that you must RIP the file with the destination unit’s Imaging Configuration. When dragging directly to a Print Queue, the file will be submitted to the RIP Queue, and the Edit window (Illustration 5) will automatically launch. Check the Print at first opportunity option and set the number of Copies to print, to RIP the job and send it to the Print Queue.
Selecting a job in the RIP Queue will activate the buttons located above the queues list. You may change settings for the job using the buttons or by right-clicking on the job line. Multiple jobs can be selected using the standard Windows buttons, CTRL or SHIFT.
Opens the selected image on the Job tab (can only be used with individual jobs). This selection will close any images already open on the Job tab.
Initiates the RIP process for the selected job(s). When the RIP process is complete, job(s) will appear in the corresponding Print Queue with zero copies.
Initiates the RIP and Print process for job(s). When RIP process is complete, job(s) will appear in the corresponding Print Queue with copy of "1".
Cancels any RIP or Print processes requested for the job, leaving the job in the Rip Queue for future processing.
Opens selected job(s) on the Layout tab.
Cancels any rip processing for the selected job(s) and removes them from the RIP Queue. This option does not delete the source file.
The operation of this selection is based on the number of jobs selected (see below). For a single job, Show Properties can also be launched by double clicking the job.
Show Properties for a single job will launch the RIP Queue window (Illustration 5). Entries made on this screen will not be submitted until the OK button is clicked. If OK is not clicked, changes will not be executed.
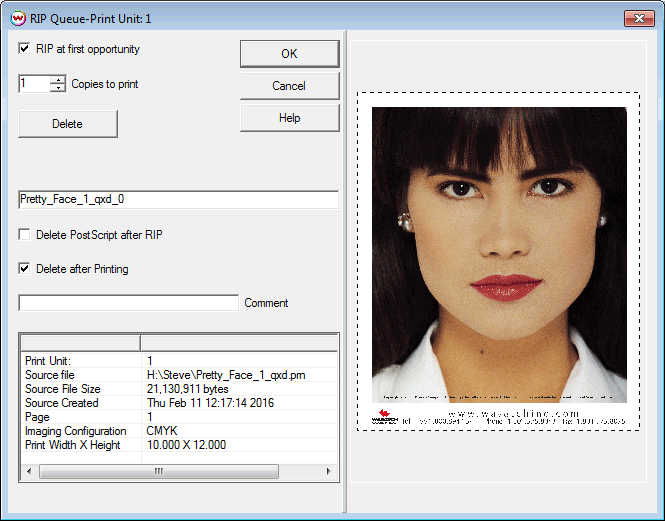
Illustration 5: Individual Job Properties
When you highlight multiple RIP Queue entries and select Show the Properties for the selected job(s) you will launch the screen shown in Illustration 6.
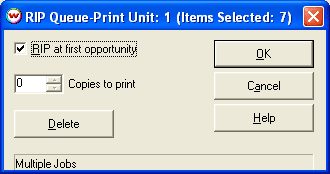
Illustration 6: Controls for multiple Queue list selections
Jobs are queued to print when a quantity greater than zero is shown in the Copies column of the Print Queue. If no functions to suppress the printing, such as Hold For Layout or Single Row Nesting, are selected on the Unit Options tab, the queued print jobs will begin printing immediately. The jobs will print in the order they are listed in the Print Queue. Any Print Units being held for future nesting will display a quantity to print without initiating printing.
The Output column displays the actual physical output that has been completed for the job.
When job(s) in the Print Queue window are selected, the buttons located above the queues list will activate . You may change settings for the job using the buttons or by right-clicking on the job line. Multiple jobs can be selected using the standard Windows buttons, CTRL or SHIFT. Additional Print Queue operations are as follows:
Initiates the RIP and Print process for job or jobs selected, entering the default quantity of one. Clicking the Printer from the buttons, above the queues, will add additional copies to print one at a time.
Opens selected job(s) on the Layout tab. Since jobs listed in the Print Queue are already ripped, they will be displayed on the Layout tab with solid blue outlines. Note: Ripped images cannot be edited or rotated in the layout without re-ripping. Learn more about this in the Layout section of online help.
In conjunction with the Hold for Layout option, located on the Unit Options tab, this control will add all jobs queued to print to the layout tab and change their quantities in the Print Queue to zero. You may decide whether to add the jobs to a layout already in progress or to clear the current layout tab contents before sending queued jobs to layout.
Launches the Print Queue properties window (Illustration 7). The Delete button here will remove the entry from the Print Queue only. Note that the job name entry window will change the listing in the Print Queue only; it will not update to the RIP Queue entry for the job. You can also change the job name shown in the Notes column by selecting Edit Notes from the Print Queue right click menu.
When selecting multiple jobs, only Copies to Print and Delete are available options. Note: Changes will only take place if you exit the window by pressing OK.
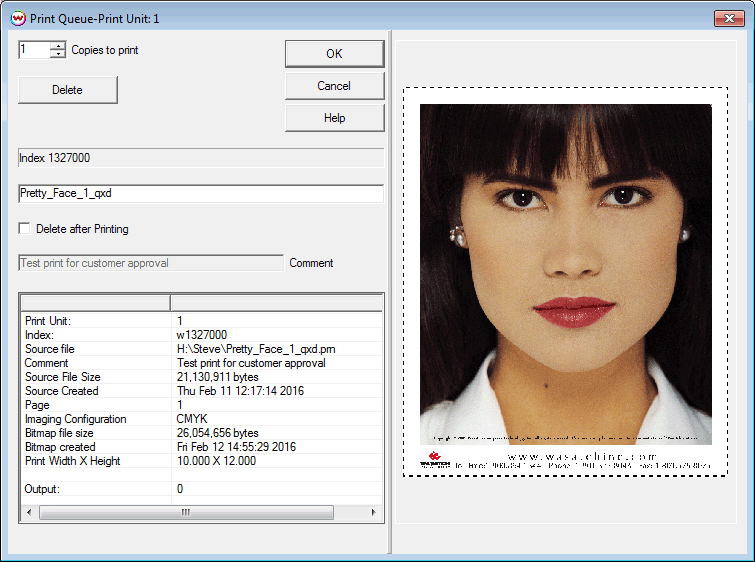
Illustration 7: Print Queue Entry Editing